Showing posts with label Kaisercraft. Show all posts

Wednesday, November 25, 2020

Hotel Layout

 I like to take photos of our hotels when we take a big trip. It's fun to see the quirky features of different places we've stayed and to document what we liked about the place. Today I have one of those hotel layouts documenting the Hotel Concorde in Munich.

I went back to Kaisercraft Lets Go collection for this layout. Our hotel was in the heart of the city, so the modern city feel of the collection was perfect for my layout. 


I journaled directly onto the layout, then used a photo frame from the collection to set it off a bit. I also clustered a few of the city themed embellishments to add to the "center of the city" feel of the layout.


I used this hotel layout to note the crazy underground parking (including using a car elevator to get to the parking garage), and our garden level (read: not quite underground) room.

Wednesday, October 28, 2020

BMW Layout

 I'm back this week with another travel themed layout. Here's my BMW layout. 


I plan most of our stops when we travel, but my husband always has a few requests. This stop was one of his requests. BMW Welt (World) is a great place to stop if you love cars, motorcycles, or even planes. We visited the main building that houses a large showroom and shop, and then took a guided tour of the BMW museum.


I used Kaisercraft Let's Go collection for these photos. It's a little bit of an older collection, as I purchased it right after we got back from Germany, but am just getting around to using it for the photos now.


I love the blues in this collection and thought the city and road themed papers were perfect for scrapping our trip to BMW Welt.

Monday, April 29, 2019

Let's Go Travel Layout

My Let's Go travel layout that I'm sharing to day is a bit more themed than I usually do, but I'm quite happy with how it turned out.


The paper that says "Germany, Germany, Germany" on it is a bit more themed than I usually use, but I fell in love with the look of it and the colors in it. Too keep it from looking too busy, I paired it with some grey toned papers from Kaisercraft's Let's Go collection.


I used some Scrapbook Customs Germany Adventure stickers that coordinated with the Germany paper to help pull in a few more colors into the layout and layered them up with embellishments from Kaisercraft's Let's Go collection as well.


Since the papers are a bit busy, the more muted color scheme seems to really work for this layout.


Monday, August 3, 2015

Nautical Layout

This is a personal blog. All editorial content and projects are intellectual property of Taylor Stamped. I do receive financial compensation and material product from American Crafts and A Walk Down Memory Lane to develop my craft posts, but all ideas and opinions are my own. Some links are affiliate links.

We had some amazing seafood when we were in Ireland, especially in Galway. I wanted to create a nautical layout to commemorate my favorite dinner out of the whole trip, but I didn't want a nautical layout that wasn't all ships and blue, white, and red colors. Here's what I came up with.


I started the whole layout with that wood grain paper with the anchors on it from October Afternoon Treasure Map. I really like how it is subtly nautical, and I felt like it was a great starting point to build the layout around. From there I decided to pull in some blues, blacks, and grays to compliment the brown and black paper.


I grabbed a bit of paper from Kaisercraft Antique Bazaar, Jillibean Soup Summer Red Raspberry Soup, and October Afternoon Summertime. I also used paper and stickers from American Crafts Shimelle. I added just a bit of sparkle with some metallic colored sequins. I needed a lot of journaling space, so I found a card from We R Memory Keeper's Indian Summer Journaling Cards.


This layout was definitely pieced together from a number of different manufacturers and collections, but in the end I was able to put together a nautical layout that wasn't quite so traditionally nautical...and I kind of love it!
Have a fantastic week!

Thursday, November 4, 2010

Advent Calendar

This post contains affiliate links.

**I created this post over 5 years ago, and it continues to be one of my most popular. I try to keep the supply list updated with similar products when products become discontinues.
Supplies


Glue Dots® challenged it's Dottesses to make a holiday decor project. As you can see, I decided to make an advent calendar. Here's a step-by-step on how to make your own.

1. Gather the basics: An advent calendar (I used a Karen Foster Count Down Calendar, but Kaiser Craft also makes a great calendar as well), Christmas paper (I used The Girls' Paperie Tinsel and Twig paper and the Tinsel and Twig Sticker Market), Glue Dots® Mini, and miscellaneous embellishments.
2. Cut 13 red 1 1/2" x 1 7/16" squares and 12 green 1 1/2" x 1 7/16" green squares. The drawers slide better if you cut the squares of paper so they are just slightly shorter than they are wide.

3. Add the Girls' Paperie Tinsel and Twig Sticker Market square number stickers to the red and green squares. I alternated colored squares and numbers (i.e. 1st was layered on red, 2nd layered on green, 3rd layered on red again... all the way to 25 which will be layered on red).

4. Cut the finger notch from the squares. I did this by holding the paper up to the drawer, tracing with pencil, and then punching out with a 1/2" circle punch. You can also cut it out with a scissors. Once I had one paper notched properly, I used that piece as a template for the rest of the squares. 5. Embellish the squares with rhinestones, pearls, brads, etc. (I used Imaginisce's I-rock, Prima Flower centers, My Mind's Eye Red Lush Brads, Green Kaiser Craft Rhine Stones, and words from The Girls' Paperie Tinsel & Twig Sticker Market)

6. Attach the embellished squares to the drawers of the calendar using Mini Glue Dots®.

7. Have fun hunting for little treasures to fill up your boxes!

I wrote this blog post while participating on the Glue Dots® design team.

Friday, October 1, 2010

Believe

One of the best things about being on the in store design team at A Walk Down Memory Lane is that when Lisa (the owner) came back from CHA this summer, I got to play with a whole bunch of the goodies she brought back. When I saw this sheet of paper from Fancy Pants' Tradition: I just knew what I had to do with it. That tree was screaming to be cut out and adorned with jewels, pearls, Stickles, candy dots, and even drops of Diamond Glaze.
I actually built my layout around the tree, once I had it finished.This layout is makes me excited for Christmas already!

Supplies
Paper: Fancy Pants Tradition (Shimmer, Christmas Morning, Tradition Strips, Tradition Cards)
Accessories: Prima Flower Centers, Basic Grey Pearls, Kaisercraft Rhinestones (Red, Green, Blue), Stickles (Waterfall), Pebbles Candy Dots (Brown)
Tools: Bazzill in Stitch’z Template

Sunday, May 30, 2010

When Old is New

Yesterday, I was showing someone this book I made almost a year ago. I realized it's never been posted on my blog, so I thought I'd quickly share it with you. People were always comparing my boys and trying to remember if the older one looked like the younger one when he was that age, so I made this fun side by side comparison book of their first year:The book is from Kaisercraft, most of the patterned paper is from Basic Grey, the brads and ribbon, and card stock are from Stampin' Up!, the cuts were done with my Silhouette, and the title was sketched with my Silhouette as well.
This upcoming week is going to be a busy one on my blog. Starting Tuesday I'll have the new June Scraptiv!ty kit featured here. It's a great kit, and you're not going to want to miss it!

Thursday, March 11, 2010

My Mind's Eye Sketch Challenge #9

My Mind's Eye has another sketch challenge going on. You can click here for all the details and deadlines. The sketch has a twist, it must also include a "blast from the past". I have so much fun with these sketches, I hope you'll consider playing along too (if you haven't already!). Here's the sketch:
And here's my take:

And a few close-ups:
All of the paper is Ooh La La from My Mind's Eye. I just love the way the colors in this paper combine to add to the vintage feel of the photograph. The pearl brads are from MME's Lush Line. The regular pearls are from Kaisercraft. The border is punched with Fiskars Sunburst border punch. The brad in the middle of the flower was made using MME paper and my I-top brad maker.

Monday, March 8, 2010

Stamping Olympics Birthday, and a Perfect Picture

First up is an all stamped birthday card. This is another new set from Unity Stamp Co. that I picked up at A Walk Down Memory Lane this weekend.I have to apologize for all of the bling, but I just couldn't help myself. Plum is such a perfectly girlie color, that I just had to add the Kaisercraft rhinestones. The couch stamp and sentiment are Unity Stamp Co. Comfy Cozy. The couch and background are stamped using stamps from Technique Tuesday's Casablanca set. The card stock is Bazzill Kraft. The ribbon is SU! Elegant Eggplant. The purple inks are SU! Perfect Plum and Pale Plum. The watermark ink is Versamark.
I also had to share with you this great picture from this weekend. I was trying to take a picture of my youngest looking at the ducks at the zoo. My oldest walked in front of the camera right as I was taking the picture. I went to delete the picture thinking it was just going to be of my oldest's jacket, and was happy to find this instead:
I feel a layout in it's future!

Thursday, February 18, 2010

3 Random Projects

Here are 3 random projects I've done recently for you viewing entertainment.
Random project 1:This is a charm and chain from Stampin' Up. The 1" x 1 1/4" charm plus chain cost just under $30 total, and I have to tell you, I'm really pleased with the quality. It opens like a locket. There's glass on both sides, so you could make this a double-sided charm if you wanted too. The glass on the front is beveled and the glass on the back is flat. The beveled glass also gives you a little room for layers and embellishments. I used My Mind's Eye's Ooh La La paper on the inside and added a Kaiser Craft Rhinestone for a little pizazz. I just put it together quickly to match an outfit I was going to wear. What I love the most, is that I can change it up as I please. So easy!

Random Project 2:
This is a frame I did for my sister who works for Make-A-Wish. I think I've mentioned before how much I love that organization and all the people who make MAW such a success. Just a little something for her office. Do you see those little half pearls inside the stars in the background? Well those (and the big pearls) are actually on top of the glass to add a little dimension to the project. The paper is from DCWV's Luxury Stack. "Wish" was cut from vinyl with my Silhouette SD. The star background was also cut with my Silhouette. It's hard to tell, but the layer under the stars is actually a pale shade of blue, not white. Oh, and that frame (mat and all) cost me a whopping $3 at Walmart.

Random project #3:
Did you know 
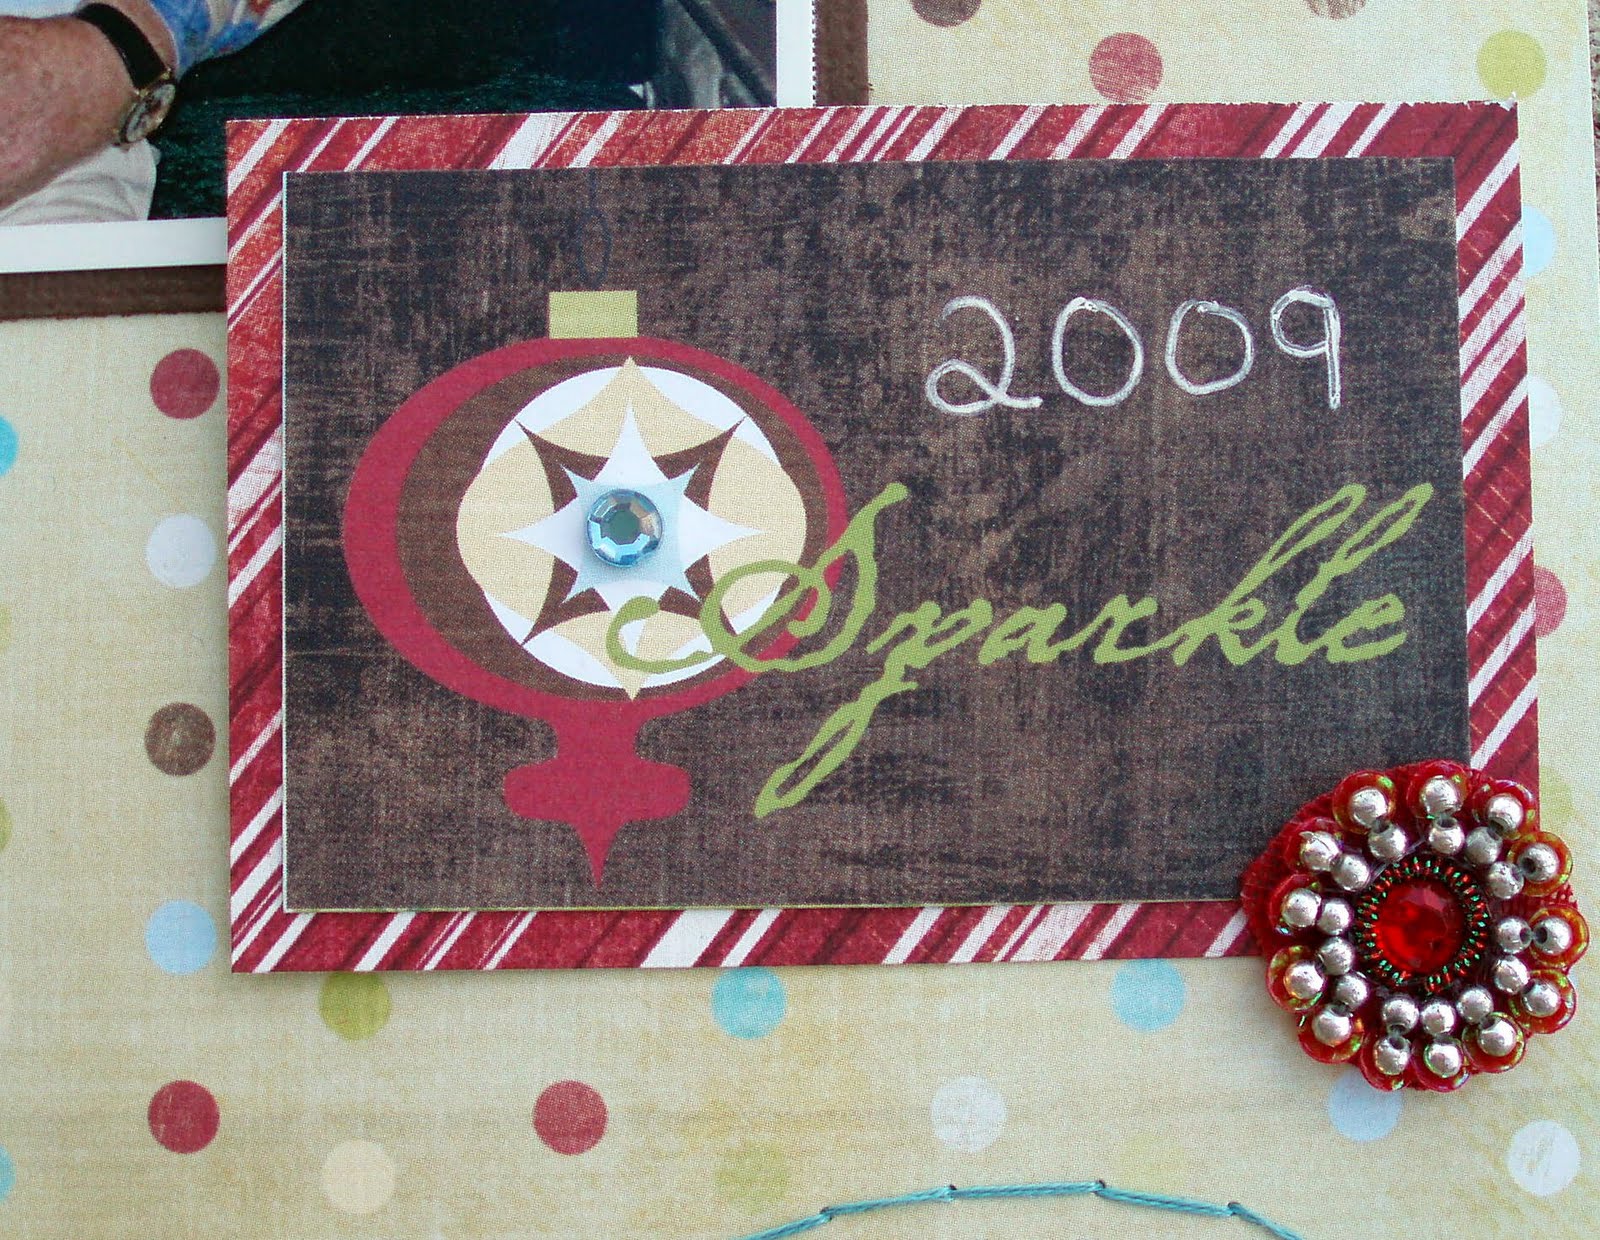
Scraptiv!ty post a new sketch on their website every month with 3 different layouts examples? I was one of the layout creators this month, and the above is what I came up with. Are you curious now about what the sketch looks like? Click here and you'll be sent straight to this month's sketch and examples. The paper and buttons are from Fancy Pants. I picked it up at A Walk Down Memory Lane, which just happens to have everything by Fancy Pants on sale this month for 25% off. Oh, and they also have Hero Arts Stamps on sale for 25% off too! Woo, hoo! Those artists at work are my boys, painting away on a canvas.

Sunday, January 17, 2010

Love Birds


Hello. I hope you are all having a fun and restful weekend. I had lots of time to be crafty! I got together with some ladies my husband works with on Friday to scrap, Saturday I taught a card class at my LSS, and today I'm spending a little time working on a great dinosaur layout to show you later this week. For today's card I thought I'd show a little love for my Silhouette since it hasn't shown up here on my blog for a little bit. Every paper piece on this card was cut with my Silhouette. I just love that machine! The paper is Wild Asparagus from My Mind's Eye, and the rhinestones are from Kaisercraft. If your looking for something to do today, head on over to My Mind's Eye's website and check out their new winter CHA releases. The new lines are gorgeous and so very fun.

Wednesday, January 13, 2010

Hidaling...?

This month's kit technique over at Scraptiv!ty is called hidaling. Now, I'm pretty sure they made that word up, but it's a great word for the technique of hiding journaling on a scrapbook page. I thought this was a pretty cool idea, and even though it's my month off from designing with the kit, I still wanted to play along. My twist? I did a card with hidaling. Here it is with my "journaling" hidden:
And here it is with the "journaling" revealed:
What do you think? Did I nail it? I think I'm going to have to send this birthday card to a crafty friend who will know to pull the tag out of the envelope! Besides the hidaling, there are a few other techniques used on this card. The stitching was done by hand. The flowers and butterfly were stamped on patterned paper and then cut out. The butterfly was also covered in versamark ink, then sprinkled with heat and stick powder, heated up and sprinkled with glitter (okay, I know that sounds like a lot of work, but from start to finish all of that only took about 60 seconds). If you try your hand at hidaling I'd love to see it! Feel free to link it up in the comments.

Supplies:
Cardstock: Stampin' Up!
Patterned Paper: K & Company Amy Butler Lotus Mat Pad
Envelope and Tag: K & Company Studio K Meadow Pockets & Tags
Stamps: Cornish Heritage Farms Collage Elements I
Fiskars Happy Birthday
Glitter: Stampin' Up! Dazzling Diamonds
Punch: Fiskars Apron Lace Punch
Ribbon: Stampin' Up! Old Olive Grosgrain
Rhinestones: Kaisercraft

Monday, December 28, 2009

Very SU! Day

I had a very crafty Christmas, how about you? I got to give hand made gifts to my family (who always appreciate the time that goes into hand made items), and I received some great new gadgets to play with too. I haven't had time yet, but stay tuned, within the next week or so I should be able to show you some creations I've made with the I-top I got for Christmas!!!!!! Now, on to some cards.Today's a very Stampin' Up! day. Everything you see is from SU! unless otherwise noted.This card uses the Praying for you stamp set, eyelet border punch, green grosgrain ribbon, and Little Leaves Sizzlits Die. This card uses one of my all time favorite SU! stamp sets, Baroque Motifs. It also uses gold embossing powder, Mellow Moss Taffeta Ribbon, and 1/2 pearls (Kaisercraft)
A little sneak preview for the week...I'm working on a fun layout using Making Memories Just Chillin', line, my Silhouette, and some very "boy" pictures. When I finish it up, you all will be the first to see it!

Monday, December 14, 2009

A Few Fast Christmas Gifts

First, thank you all for your kind comments! They make me so happy that I just need to add these pretty KaiserCraft rhinestones to the giveaway.Remember it's going on all week, so leaving a comment on this post will enter you a second time for the drawing. The prize now includes a stamp set and the Kaiser Craft rhinestones!

Here's a set of Christmas ornaments I made. Instead of trading cookies with the neighbors, I give them one of these when they bring me home made goodies.
I struggled photographing these, but I think you get the idea. I just accordion folded strips of paper and put them into the ornament, used a rub-on on the outside, and tied a pretty ribbon through the top. Easy and pretty! These are a bit flatter than the classic round glass ornaments. I found these at Michael's.
My 3 year old made the following ornaments this year. Very similar, but more kid friendly:
The ornaments are plastic instead of glass (I found them at Hobby Lobby). They came with white foam balls inside. I put the foam into a plastic bag, added a few drops of ink from Stampin' Up!'s reinkers and let him shake, shake, shake away. He thought "a little glitter" would be good too, however, his version of "a little" was quite a bit! I then taped a rub-on onto the ornament and let him rub like crazy. Taping it on made it so he didn't have to worry about it shifting while he worked. I removed the tape and the rub-on backing when he was done.

The last project is something a friend of mine and I made for our MOPS steering team this year:Everyone got to take one of these beauties home with them from our Christmas party. The terracotta pot was painted red and dressed up with a pretty ribbon. 20 punched out circles form the ball on top. This great Christmas paper is from Crate Paper (one of my new favorite companies!).
I hope you're all having a very crafty Christmas!