Friday, February 28, 2014

Beer Shaving Soap

My latest obsession is making soap.  My first soap was Coconut Shea Butter Soap, and after trying it, I was hooked.  Not only do I love figuring out what the different oils will be like when combined, I enjoy the process of making a 100% natural soap (I just don't love the waiting time while it cures!).  I ran across a few recipes for using beer instead of water in soap making.  I thought it sounded like fun, so I came up with my own recipe for beer using some of my favorite ingredients.


I've been using this soap for about a 2 weeks now, and it's fast become my favorite.  The beer gives it a really rich, creamy lather.  I call this shaving soap because I added a bit of castor oil to make the foam nice and stable, which makes it especially good for shaving.  I also added a bit of eucalyptus essential oil, because I thought it complimented the earthy smell that the beer gives the soap.  As an added bonus, since it's made with beer, my husband is willing to use homemade soap now.  Here's the recipe:

Beer Shaving Soap

8 oz Coconut Oil
8 oz Olive Oil
12 oz Soybean oil
3 oz Castor oil
4.3 oz Lye
11 oz Beer
.5 oz Eucalyptus oil (optional)

Have you made soap with beer? I'd love to hear what you think about it.

Wednesday, February 26, 2014

St. Patty's Day Shamrock Door Decor

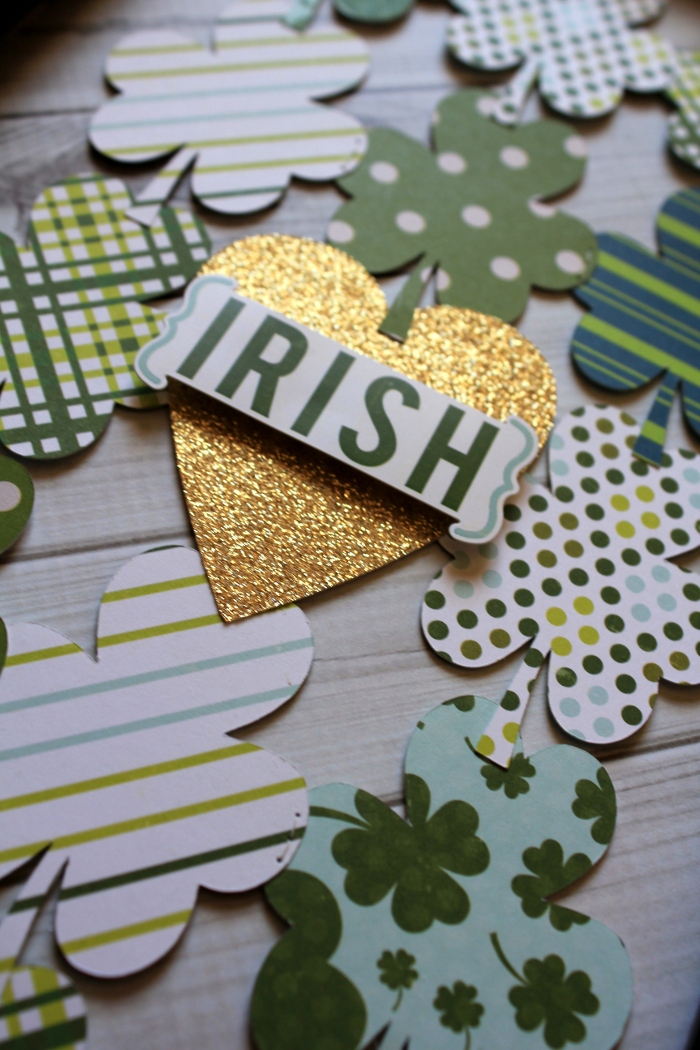
My front door needed a little something to hang on it for St. Patty's Day, so after a little playing around I came up with this St. Patty's Day Shamrock Door Decor.
 

I started by cutting a whole lot of shamrocks with my Silhouette out of Echo Park's St. Patrick's paper collection.


I also cut a heart from gold Pow! paper. The hardest part was figuring out how to keep the shamrocks connected to each other an how to attach them to the frame.  Since I removed the back of the frame, the shamrocks needed to sort of float in the frame space.  They also needed to be fairly stable since this will be hanging on my front door, and not just on a wall.

I decided to sew each shamrock to the one next to it.  You can see in the photo below a few little stitches on each side of the shamrock.  To keep them attached top to bottom, I ran a length of bakers twine from top to bottom of each column, attaching it to each shamrock as I went.


Here's a very ugly picture of the back side, so you can see what I mean. You can also see the scotch tape I used on the back of the frame.  I used that to hold the twine in place while I both glued and stapled the twine in place.  After both gluing and stapling, I decided it was way too much work to try to remove the tape.


That's all there is to it. After that I attached a few magnets to the bottom of the frame on the back side (my door is metal, and this helps keep the frame from banging around), and I hung it on my door.


Thanks for stopping by!

Saturday, February 22, 2014

Punch Board Mini Album

I think I may have said (more then a few times) that I really like making mini albums.  The moment I got my hands on Pebbles Yours Truly collection, I knew I wanted to combine it with the annual photos I took of my sons this fall and make a mini album with it using the We R Memory Keepers Envelope Punch Board. It's taken me a bit to find the time to make it, but I so glad I finally did. I couldn't be happier with how it turned out!


I started by making envelopes with the We R Punch Envelope Punch Board using the directions for the A6 sized envelopes.  


 Instead of folding the flaps on the envelopes to make a horizontal envelope, I turned the envelope to a vertical orientation and cut the top flap off.  Now the pages are also pockets for tags, photos, or journaling.


Then I punched 2 holes on the side of the envelope to put rings through to bind the album. 


Finally, I added photos and lots of embellishments. 


This album was so much fun to put together, and I'm sure I'll make another one from the envelope punch again, soon.  


The best part is, by using the envelope punch instead of pre-made envelopes, I can customize the size and the paper of the envelope to just about anything I want! 


Thanks for stopping by!

Tuesday, February 18, 2014

Ice Skating That's My Boy Layout

I have an Ice Skating layout today that uses Echo Park's brand new collection That's My Boy.  You can currently find it in the Brick & Mortar store at A Walk Down Memory Lane, and it should be available here in the online store in the next few days. 
 

I LOVE this collection. I really is the quintessential "boy" collection.  There are lots of bold stripes, dots, plaids, etc. mixed in with some great sports themes and general boy words. 


I've already created multiple layouts with this collection and plan to make a few more when I have a bit of time. 

 Thanks for stopping by!

Tuesday, February 11, 2014

Arrow Pencils

I have one last Valentine project.  This was the quickest one yet! My kids love getting new pencils. A few weeks ago Silhouette's free weekly cutting file was the pieces to turn a straw, stick, pencil...just about anything small and thin, into an arrow.  I couldn't resist using it to make some arrow pencils for my kids. 


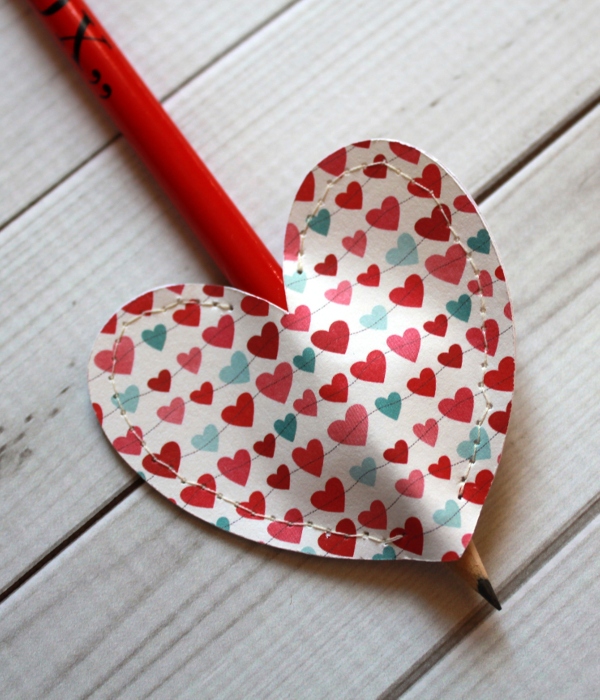
I used my Silhouette to cut paper from the Pebbles Inc Yours Truly 6 x 6 paper pad into the arrow pieces.  I had some fun SRM "XOXO" pencils to use for the shaft of the arrow. 


I decided to sew the 2 hearts for the tip of the arrow together. I left just enough space to slip the pencil in.  It's such a snug fit, that you can actually use the pencil with the heart on, and not have to worry about it falling off.  Plus, the sharpened tip of the pencil sticking out of the heart makes a pretty cute arrow tip.

Monday, February 10, 2014

Homemade Soap and Handmade Valentines

My kids like to give store bought candy valentines to their friends, so we buy those. But sometimes it's fun to make a little something special for the teachers and aides.  My very first batch of homemade soap happened to be ready just in time for Valentine's Day. Today I'm going to share my recipe for homemade soap, and share some pictures of how I packaged it up for some handmade valentines


 Inside each one of the bags is a bar of soap.


These were really easy to package up.  I made a paper wrap from a single strip of patterned paper and a printable label.  Then I slipped them in these pretty little treat bags.  While the perfect color for Valentine's Day, these pretty printed bags are from Pebbles Inc's  Special Delivery baby girl collection (coming to stores very soon!). 

I sealed the bags shut with a piece of washi tape (that stuff is just so darn useful!).  I punched 2 little holes through the top of the bag.  I then wrote a quick note ("You're a soaper teacher!") on a Pebbles Yours Truly tag and threaded it through the holes in the bag. I finished it off with a little sticker matching sticker in the corner of the bag. 


For those of you who like making soap. I thought I'd share my recipe.  If you haven't made cold process soap before there are a lot of really good step by step tutorials if you search on-line.  I'm not going to re-invent that wheel.  However, I did come up with this recipe on my own. I wanted something that used shea butter, and I built from there.  If you're just getting into making soap, I'd really encourage you to find out about different oil and butters and how they effect your soap.  It's really interesting to find which ones clean well, which ones lather up well, which ones are super moisturizing...etc. Anyways, here's the recipe I came up with.  After 4 weeks the pH is testing at about a 9, so it's in just about the perfect range.

Coconut Shea Butter Soap 
(5% superfatted)
 10 oz olive oil
10 oz coconut oil
5 oz shea butter
6 oz soybean oil
 4.3 oz lye
5 oz water
5.25 oz coconut milk

Thanks for stopping by!

Friday, February 7, 2014

Valentine Banner - Linen and Paper Hearts


I saw these fun little linen hearts from Maya Road, and decided I just had to pair them with Pebbles' Yours Truly to make a Valentine banner of linen and paper hearts


I used my Silhouette to cut 2 paper hearts that matched the size of the linen hearts. 


 I used a little bit of everything from Yours Truly to embellish the banner: paper, stickers, layered stickers, even journaling cards. I also used some washi tape and sequins for good measure. 


I used Glue Dots® for my primary adhesive on this banner.  They were especially useful for sticking paper to fabric.  


I finished up by stringing the whole thing up with some red baker's twine.  This cheery little banner happens to have found a home hanging up on the banister in my living room.  


 Thanks for stopping by!

Tuesday, February 4, 2014

Zoo Fun Layouts

I started these Zoo Fun Layouts last week, but then every single person in my house got strep one at a time.  Today, when I sent the kids off to school, I couldn't wait to spend a little time in my craft room!  I got 2 layouts done today.


I used Basic Grey's Carte Postale as the base for these layouts. 


 I used lots (and lots) of random leftover embellishments and stickers. It was a nice little stash buster project. 


 I also mixed in some American Crafts Project Life Zoo Cards for journaling and layering.


That's it for today.  Thanks for stopping by!