Wednesday, April 26, 2017

Travel Memorabilia Envelope


Today I have a fun travel project for Paper House and Scrapbook Adhesives. If you're like me, you collect a lot of memorabilia (tickets, maps, programs, etc.) when you travel. I have a step by step tutorial for creating memorabilia envelope that's durable enough to take with you when your traveling. It also has a fun pattern, so all the leftover bits that don't fit a scrapbook page can go back into the envelop, and the envelope can be added right into your album.


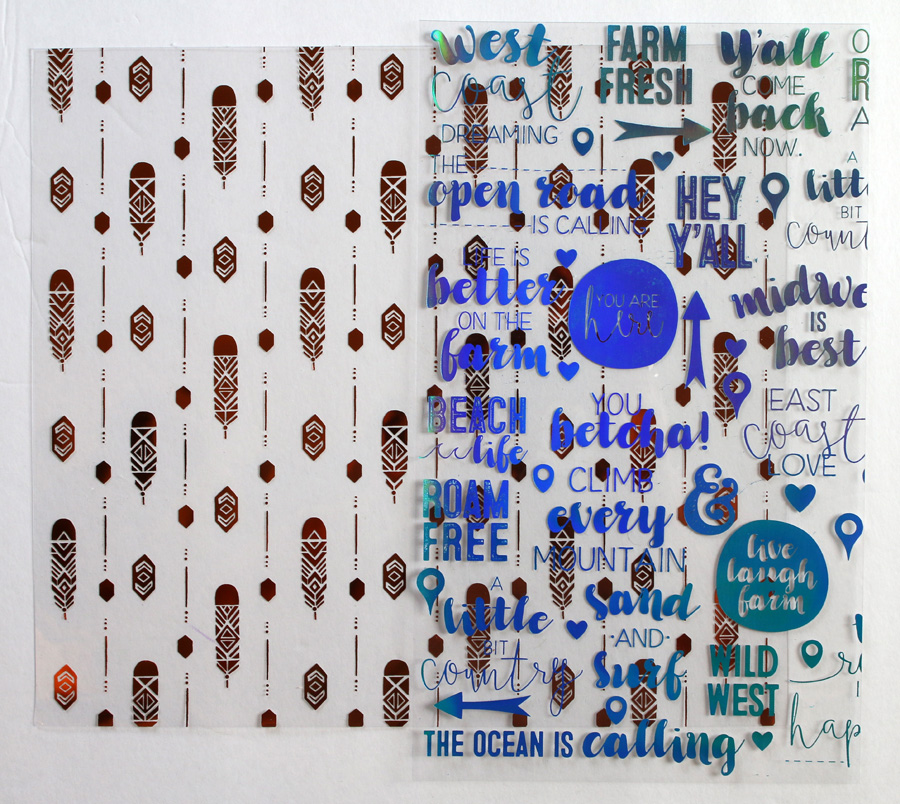
To create this envelope you'll need 2 pieces of Paper House's Clear Cuts Acetate Paper, (I used 1 sheet of Discover USA and one sheet of Southwest Adventure Feathers), Paper House Southwest Clear Stickers, Scrapbook Adhesive Adhesive Lines, a way to score paper, and some velcro (optional).


Cut your top piece of acetate to 7 1/2" wide by 12" tall. Cut your bottom piece to 11" tall by 12" wide.


Score the top sheet of acetate 1/2" from the top edge, 1/2" from the bottom edge, and 1/2" from the left edge. Fold in along all of the score lines.


Score the bottom sheet of acetate 7 1/4" from the left edge. Fold the piece of acetate along the score line.


Trim the short edge towards the score line into a point to form your envelope flap.


Add Adhesive Lines to the 1/2" scored areas of your top sheet of acetate.


Slide the bottom sheet of acetate into the top sheet of acetate to create your envelope. Press down firmly where you placed the Adhesive Lines to create a tight seal. 


I added some self adhesive velcro to the flap of my envelope to keep it shut. I hid the velcro under a sticker from the Southwest Clear Stickers set (you can see some of the white of the velcro peeking out from underneath the sticker in the photo above).


I also punched holes through the edge of my envelope so it can be added to my scrapbook. I take the envelope with me on vacation to collect items. When I get home, I add the smaller items like tickets to scrapbook pages, then I leave larger items like maps in the envelope and put it directly into my album near my vacation layouts.


This travel memorabilia envelope is a great way to keep everything in one place. Creating it from sheets of acetate makes it more durable than using paper. If you have any questions about this project, please feel free to ask it in the comments or send me an e-mail.

This post was written while participating on the Paper House Design Team. I also received product from Scrapbook Adhesives to create this post.

Mother's Day Gift Card Holder

I'm over on the SRM blog today sharing a pretty gift card envelope perfect for a Mother's Day gift card holder.


Head on over to the SRM blog to get all the details.

Wednesday, April 19, 2017

Birthday Countdown Sign

You can find me over on the SRM blog today with a birthday countdown sign.


Head on over to the SRM blog to find all the details on making this with some SRM vinyl and a Silhouette Cameo.

Friday, April 14, 2017

Isaiah 53 Bible Journaling

I have always loved the message of Good Friday. I love the time it gives for reflection and the message of Christ crucified that I may live. I love that our sorrow is short lived and we look forward to an Easter of rejoicing. Today I wanted to do a bit of Isaiah 53 Bible journaling.


I wrote Isaiah 53:5 in the shape of a cross. I then went over my writing with an eraser to distress the words a bit. I shaded over the words with a brown pencil to give the cross a more solid feel.


While purple isn't usually my favorite color, it is the color of lent. It was definitely the right feel for this page. I used 3 different colors of purple Distress ink and sponged it on the background. I just used a bit of scratch paper to mask off the cross.


I hope you have time to reflect this Good Friday. Have a blessed Easter!

Thursday, April 13, 2017

Camping Layout

The weather's warming up which is making me really antsy to get our there and camp. Since we're not quite ready to take the camper out yet, I thought I'd do something else I love and scrap some camping photos instead. Today I have a camping layout that's all about camping with our dog, Steve.


I may have stock piled a bit of Pink Paislee's Outfitters collection. This collection is so bright and fun. It's full of great prints...I mean, how can you not love that camper?!?

 
The puffy stickers are some of my favorite!  I had a hard time not using the entire sticker sheet on one layout. There's just something about the look of puffy stickers that makes me happy.


My title was pretty simple, so to keep it from looking plain I mixed up the alphas that I used. Changing the material (stickers to chipboard) and the color added a bit of interest. You could get a similar look by cutting your title with the Silhouette (which I do often), but I still love using alphabet stickers, too.


This camping layout is just going to have to tide me over until the camping season starts up again! 

Monday, April 10, 2017

Multi Photo Football Layout

I'm still working through my football photos. Today I have a multi photo football layout to share.


I've had these football themed papers and stickers from Paper House's All Star collection sitting in my stash for quite a while. I decided to finally sit down and use it. I was fortunate enough to be quick enough to snap some photos of my son's touchdown during a flag football game. It was only with my iPhone, but they're still photos of the fun moment.


I printed out a series of photos that that show his reception, run for the touchdown, and all his friend piling on him in celebration in the end zone. It was a really cute moment, and I'm so glad to have the memory on paper. 


Since the photos tell a story in linear order, I literally scrapped the photos in a top down line. It's an easy way to make sure the story is told in order. This multi photo football layout is ready for the books...and my football player is already ready for next season!