
 This month Glue Dots® challenged its Dottesses to create a gift. The timing of this could not be more perfect, as I have been planing to make a gift for a friend who recently found out she is going to be a grandma. She's so excited and I just can't help wanting to share in her joy. Here's what I came up with:
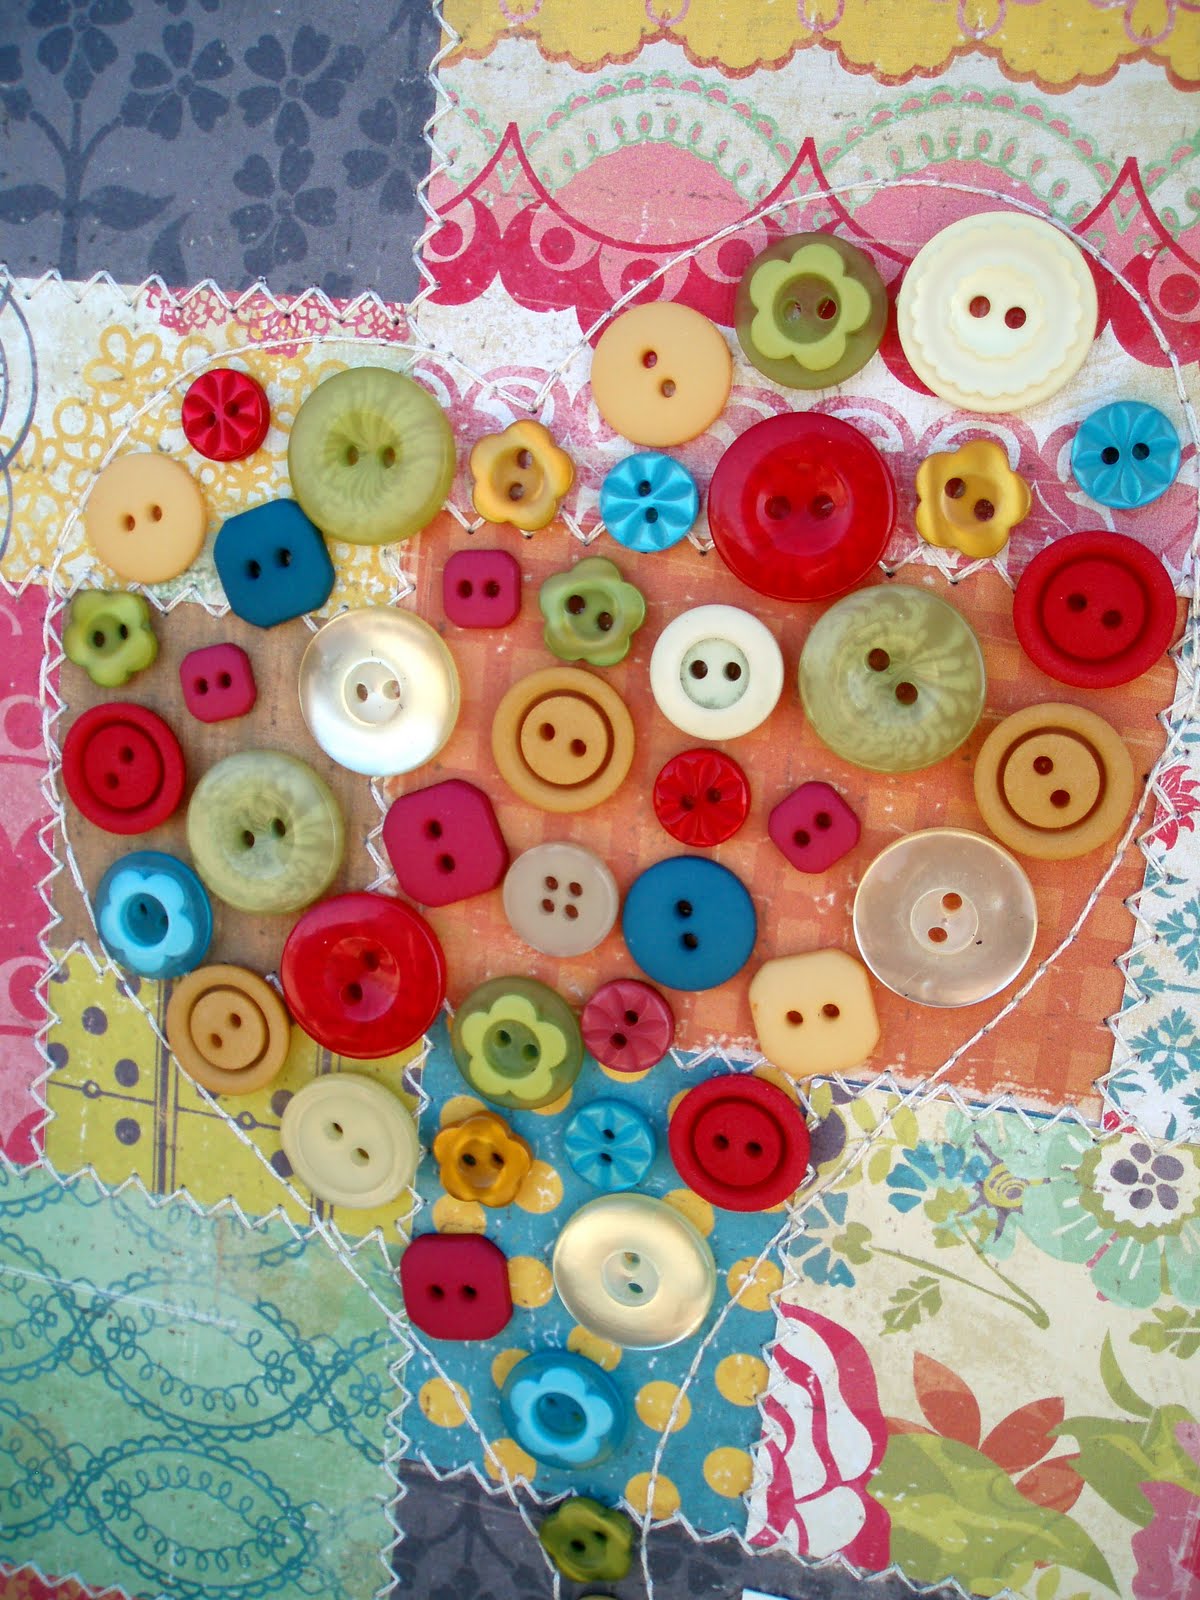
One of my favorite uses for Glue Dots® is adhering buttons to projects. Since there's no drying time involved, I could adhered all of these buttons to the picture in about 5 minutes with no mess.
Making this picture was pretty easy, it just took a bit of time since I did all the stitching by hand. If you stitch with a machine or skip the zig zag stitching all together, it would go much faster. Here are the step by step instructions for making one of your own.
1. Find a frame that suits your decor. This is an 8" x 10" Better Homes and Gardens frame.
2. Choose a number of sheets of patterned paper to create your background. This is a great way to use up smaller pieces of patterned paper. I used Crate Paper Restoration paper.
3. Cut a piece of scrap paper to fit your frame (i.e. because my frame is 8"x 10", I cut an 8" x 10" piece of scrap paper). Use this piece of paper as a base on which to arrange your patterned paper. Use Glue Dots® Removable adhesive to temporarily hold your paper in place while you are arranging your background.
4. When you have decided where all of your background pieces are to go, adhere them permanently with Glue Dots® Dot 'n Go.
5. Stitch around the edges of your background papers.
6. Stitch the shape of a heart onto your background paper.
7. Arrange buttons inside the heart. Use Mini Glue Dots® to adhere buttons to background.
8. Print "Always and forever is a Grandmother's love" on card stock. Cut out and adhere to background with Mini Glue Dots®.

I wrote this blog post while participating on the Glue Dots® design team.

No comments:
Post a Comment