I have another layout from our fun day together at the science museum. The best part about having a decent camera on my phone is that I actually end up being in some of the pictures with my kids!
I am a sucker for any paper that has a heart on it and isn't pink, so I scooped up the blue sheet with the big red heart on it from Simple Stories Say Cheese 2. I paired it with a classic polka dot (also from Say Cheese 2).
I had a strip of black and cream striped paper from Simple Stories I Am sitting on my desk from another layout I had just finished. It was the perfect piece to slip behind my blue stripe to ground the layers a bit more.
The alphas on this layout needed to be just right, and I happened to have these fun black and white ones in my stash! The "You are my Happy" journaling card was also in my stash, and is part of Pebbles Home + Made collection.
With a few layers (new and leftover!), I was able to finish up another layout about our fun day together. Though, honestly, any day out with these 2 is a fun day!
Thanks for stopping by!
My kiddos had a day off of school a little over a week ago. One of our favorite day trips is to a science museum that is about an hour away from our house. There's even a special exhibit going on right now called Rad Science that's all about the physics behind skateboarding. It was really cool, and provided lots of opportunities for fun.
I try really hard to balance my love of capturing memories with being able to put my camera away and lose myself in having fun with my kids. I want my kids to remember the fun we have, not that mom took pictures of the fun that we had. So...for days like this, I leave my big "nice" camera at home, and only pull out my my camera phone here and there. In fact, I forget to take pictures of some things all together! Are my pictures as nice? Nope, but it's a great way to have some photos of the fun and make sure I'm still involved in it.
For this layout I started with some papers from Crate Paper's Boys Rule. The slightly muted colors of this collection seemed just right for skate park science.
I used some Basic Grey Hipster Brads to embellish my layout and to create my title. There is actually a brad that says "RAD" in the pack, so I used it paired with some alphas to make my "Rad Science" title.
I never seem to have enough (or just the right) journaling tags. One of my favorite ways to create space for journaling is to add paper behind some chipboard photo frames and journal inside. If one isn't enough just add a second one, like I did on this layout!
I almost had as much fun scrapping this layout as I did playing with my kids at the Rad Science exhibit...almost!
Thanks for stopping by!
Sometimes I start a project with something in mind, and it ends up completely different than what I had in mind. My welcome sign is definitely one of those projects.
I wanted to make a new welcome sign for my front door. I wanted it to be summery, and I had a bit of an idea in mind, but when I started looking for a piece of paper, I came across this polka dot sheet I used for the background. I really liked it and decided that's what I wanted to use for the jumping off point for my sign.
All of the papers and embellishments are from Basic Grey's Highline collection. I couldn't find any alphabet stickers that I liked for the letters for my welcome sign, so I decided to cut "Welcome" with my Silhouette Cameo. The orange didn't pop enough, so I used a black Wink of Stella marker to trace the center of the welcome.
I also used the marker to color some wood chevron pieces from Studio Calico to turn them black and add a bit of shimmer. I've also found that whenever I'm making a decoration for my front door, Glue Dots® are the best adhesive to hold everything together. My front door is used a lot and the sun shines directly on it for at least half of the day, so Glue Dots® are the only adhesive that holds up to the punishment.
While this sign is quite different from my usual style, and different than what I set out to create, I kind of love it anyways.
Spring means baby animals on Grandma & Grandpa's farm. My kids love seeing, petting, and even holding the baby animals. When I got Basic Grey's Highline collection, I wasn't necessarily thinking spring on the farm, but you know what? It was perfect for this layout. Here's my spring layout using Basic Grey's Highline collection.
I started knowing that I wanted to use some of the paper that had orange on it, solely because it made my photo pop (it mirrors the orange in my son's sweatshirt). From there I just started papers and stickers that I liked and layered them up.
I know that beautiful hand-painted titles are really in style right now. However, I don't have good enough handwriting to pull this off, so I cheated and pulled a font that looked similar to a handwritten title and cut it out in black paper with my Silhouette.
I started these Zoo Fun Layouts last week, but then every single person in my house got strep one at a time. Today, when I sent the kids off to school, I couldn't wait to spend a little time in my craft room! I got 2 layouts done today.
I used Basic Grey's Carte Postale as the base for these layouts.
I used lots (and lots) of random leftover embellishments and stickers. It was a nice little stash buster project.
The start of school is just around the corner. I'm always looking for ways to organize, simplify, and, of course, display the fun projects my kids bring home. My refrigerator doesn't have much room, and often doesn't do their projects justice. Hopefully this will:
My husband builds things, and makes things, and repairs things, so there's always scrap wood lying around. I had him cut a board that was about 3 1/2" tall to a little over 2' long (I actually held my hands apart and said, "I want it about this ____ long." Which makes him roll his eyes!). I painted it with some leftover whitewash from my bulletin board project.
I used mini clothespins from Little Yellow Bicycle. I especially loved these for this project because they have words on them like, "love" and "wonderful". I decided to stain them a blueish color (not shown in the picture above, but you can see it in the picture below) with Lindy's Stamp Gang T-bird Turquoise Flat Fabio Mist. I attached them with Glue Lines from Glue Dots®.
Now all I have to do is get my husband to hang it on the wall, and I've got a great place for my kids to display their work!
Thanks for stopping by.
I wrote this post while on the Glue Dots® Design Team.
I have 2 layouts today. One uses some of my extra Basic Grey and Lindy's Stamp Gang products from the blog hop and features a little bit of fun we had while away from home. The other uses up some of my Simple Stories papers and features some fun we had at home.
There's a great pedestrian bridge in Omaha, NE that spans the Missouri river. Halfway across the bridge is the Iowa-Nebraska state line, so of course we had to have some fun with that (look, we're in different states! Look we're in 2 states at once...and so on). I layered up some Basic Grey Carte Postale papers, and colored my chipboard letters with mists from Lindy's Stamp Gang.
These pictures just don't do these letters justice. These babies shimmer like crazy in real life! They're so pretty.
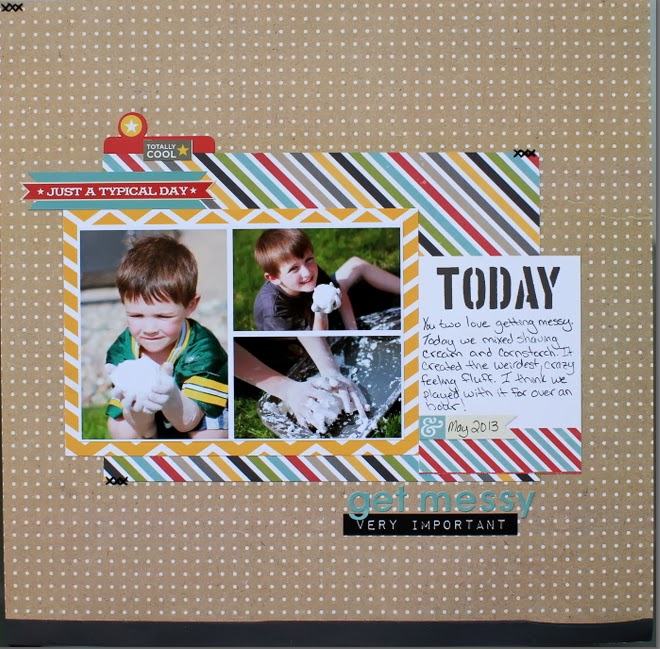
I also scrapped a little fun at home. We had a blast making a mess mixing shaving cream and corn starch. If you have kids, I highly recommend you try this (outside! it's messy). You end up with the weirdest feeling mixture, and a good hour of entertainment.
I kept this layout pretty clean and simple. The background paper is from Basic Grey's Fact collection, but all the rest of the papers, stickers, and journaling cards are from Simple Stories 24/7 collection.
As you can see, I did a bit of layering with the stickers and added some strategic stitching to finish things off.
I am beyond excited about the team up for today's blog hop!!! I mean who doesn't love working with Basic Grey and some gorgeous mists from Lindy's Stamp Gang? In fact, I'm so excited that instead of making 1 video tutorial, I made 4...yup, I got a little carried away. I made 1 project for today's hop, but there are a number of little techniques used, so instead of making 1 really long video, I split it up into 4. That way, later if you just want to re-watch 1 technique, you don't have to go searching through a really long video for it.
If you're like us, you tend to take lots of mini trips in the summer (and maybe even a big trip). Over the course of those trips you collect mementos that may, but usually don't, fit well onto a scrapbook page. My solution for that is to create an envelop mini album that has pockets to stash things like maps, concert tickets, and the like.
This album, built from envelopes, has a handy little pocket built into each page to slip your memorabilia. I used Basic Grey's Carte Postale (this is my new favorite travel paper, it's rich in color and full of really fun travel themed patterns) and Lindy's Stamp Gang mists to embellish the pages.
You can check out step by step instructions on building your own envelope album from envelopes and Glue Dots® Continuous Line in this video:
To create the cover of the album, I used an inking technique using Lindy's Stamp School Mists (which are soooo shimmery and rich in color!) and Basic Grey's Carte Postale paper.
You can see a step by step on sponging with mists in this video:
I made an inside page to hold a map from a zoo trip, and embellished it with custom colored chipboard stars.
The video below shows how you can use Lindy's mist BEFORE adding water (Lindy's mist are shipped dry, and you add the water when the get to you) to paint custom embellishments.
Finally, for this last page I used Lindy's Stamp Gang Mists to create a custom colored journaling tag by misting onto my craft mat and smooshing the tag into the mist.
Here is the last video I have today on that technique.
Thanks for sticking with me through that long post! There is just so much to love about Glue Dots®, Basic Grey's Carte Postale, and Lindy's Stamp Gang Mists. Thanks for stopping by, and don't forget to check out what the rest of the designers have created. There are some really amazing projects for you to check out, and some more great video tutorials.
Hop Along With Us:
Glue Dots (you'll find the a contest entry form here!)
This past weekend my boys went to one of those free kids workshops at Home Depot where they get to build something. Not only did they build and paint bird feeders, they had a lot of fun doing it. Thanks to Basic Grey (who just happened to make the perfect paper for scrapping these photos called Bow Ties), I was able to print the photos out and get them on to a layout the very same weekend. That almost never happens!
Sometimes there are little mementos I like to keep that don't lend themselves well to actually adhering to the scrapbook page. When that happens, I like to make little pockets on the layout (usually behind a photo) to put the memento in. Here I added the directions for the birdhouse in a pocket behind the far left photo. I adhered a chipboard arrow to the directions to make them easier to pull out (and so I don't forget they're there).
I think the best thing about making pieces to decorate my home instead of buying them, is that I'm able to personalize them. I like to surround myself with things that remind me how blessed I am and to be thankful for those blessings each and every day. So, that was the mindset I started with when I decided to make a little piece of art for my living room shelves for Valentine's Day.
Basic Grey was kind enough to send all the Glue Dots® Dottesses some gorgeous Basic Grey paper to work with this month...and wouldn't you know it, their True Love line was just right for my little decor piece.
The opening on this frame is about 10" x 10". I personalized this frame by adding our wedding date to the bottom heart, my oldest son's birth date to the center heart and my youngest son's birth date to the front heart. It's a subtle but fun reminder of my very favorite blessings.
I used the print and cut feature on my Silhouette machine to print the words and then cut the hearts around them, but you could achieve the same thing by using a word program and running the patterned paper though your printer. I used Pop Up Glue Dots® between the heart layers to add some depth to the frame.
I mixed 2 kinds of alphabet stickers for the title. Again, this just adds a bit of depth and texture to the frame. The red circle letters are from Basic Grey's True Love line. The white alphas are American Crafts White Amy Tangerine Muse Thickers. I often have problems getting chipboard style alphas like the white ones to stick really well to my paper, so I usually add a few Mini Glue Dots® to the back of them to make sure they're not going to fall off.
Thanks for stopping by today.
I wrote this post while participating on the Glue Dots® Design Team.
A Walk Down Memory Lane carries these mini library drawers that are made by 7 Gypsies. Since I first saw them, there's been a little voice in the back of my mind saying, "There's got to be a cool way to use that as a mini album." Well full inspiration finally hit, and while it's not exactly a mini album, I've decided to use it to hold a whole series of mini albums.
This will be a Father's Day gift for my dad. Almost every time we go visit my parents (who live about 7 1/2 hrs away) my boys ask to go to my dad's work. You see, Papa Bruce's work has lots of cool bucket trucks, diggers, and work trucks. They put on their safety glasses and pretend to be drivers. I cut a stencil from vinyl, and added the words "Papa's Work" to the drawer with a bit of paint. Then I set about creating mini tag albums to house in the library drawer. I have 4 albums that will be given with the drawer for Father's Day. As part of the gift, I will continue to make mini tag albums from pictures from future visits to add to the drawer.
This album, of their most recent visit, was made from Bo Bunny's On The Go collection. For a little extra fun I asked my boys what Papa Bruce does at work, and then added their answers to the mini album.
This album was created from My Mind's Eye's Miss Caroline. This was the very first visit to Papa's work. My boys were so little (translation: sort attention spans) that I only have 2 pictures from this visit to Papa's work, but the beauty of these small tag albums is that 2 pictures are enough to make a meaningful album.
This album was created from Echo Park's This & That Charming. Another bonus to these tag albums is that you can make them from leftover scraps from other projects. I created a few layouts from my This & That collection pack and then created this album.
I'd also mention that tag albums are a great way to start if you want to try your hand at a mini album, but feel a little overwhelmed by the idea. You can buy a package of pre-made tags and then add as many tags as you need to have the right number of pages.
This is the outside of the album (yes, I do
know sonowmobile is spelled with an “e”. At some point before I
photographed it, the “e” fell off!). Closed, the album measures 4" x 6" with a 1/4" spine on each side.
These are a few shots of the inside. This
is basically an accordion style album that gets adhered inside a card
stock cover. I promise to do a video tutorial on how I put this
together soon. Basic Grey has magnetic snaps which I used (cleverly hidden under stickers) to keep the album closed. This album went together really quickly. I just pulled a
few pieces of Genuine paper, and added accents with the Genuine sticker
sheets.
I hope you have a genuinely (pun totally intended) fun weekend!
Just a quick post today. I wanted to let you know that A Walk Down Memory Lane's April Featured Manufacturers are Basic Grey and Hero Arts. I made this layout using Basic Grey's Oliver. I also wanted to share this fun photo:
These are "cheeseburger" cookies that my preschooler took to school today for April Fools Day. They were really easy and turned out super cute too! Here's hoping for a bright, warm, and sunny April.