Thursday, July 29, 2010

Grunge Board Bracelets

I'm really excited to show you these bracelets today. I've seen bracelets like these pop up here and there around the Internet, but now I've finally had the chance to make some. I'm not sure who came up with this idea first, if anyone knows who did, let me know, I'd love to give them the credit here. They're relatively quick to make, and lots of fun. I made 6 to start out with, but you better believe I'll be making more. I think I'll try stamping on them the next go around. First I'll show you all 6 and give you a run down on how to make them yourself. Then I'll show each one individually and tell you the different items/techniques I used to embellish it. Hope you enjoy them as much as I do!

To make one of these:

1. Cut Tim Holtz Grunge Board to 1”, 1 ½” or 2” with. I used pre-embossed Grunge Board, but you can use the plain GB and emboss it yourself.

2. Paint the front side (the side with the bumps) of the GB with any kind of acrylic paint (I used Adriondack and Claudine Hellmuth). When the front side is dry, paint the back side. I painted all of my back sides a white, almost clear color so the color of the GB color could show through.
3. Sand the front side until the paint comes off the raised pattern, exposing the GB on the raised pattern.
4. Ink the front side of the bracelet. Then use a wet paper towel to wipe the ink off of the bracelet. The ink will wipe off of the painted areas, but not off the exposed GB (at this point you can add a clear, shimmery layer of paint or Glossy Accents if you like, but it is optional).
5. Add a way to fasten the bracelet. I set a snap into the bracelet for a fastener.
6. Add some embellishments to the bracelet. I sewed most of my accents on, I figured they would hold longer sewn than glued.

This one is one of my favorites. I painted it yellow, added orange ink, and embellished with flowers from Bo Bunny and a yellow button.

This one was done with purple paint and grey ink. I sealed over it with a pearl paint to give it a pearly sheen. I sewed on a pearl and crystal beads for the embellishment.

This one has green paint and brown ink. I traced and cut 2 flowers from the same Grunge Board I used to make the bracelet. I painted both flowers brown, then sanded them and inked them with a lighter brown ink. I sewed the button and both flowers onto the bracelet.

This one was painted red with grey ink. I set My Mind's Eye Red Lush Brads into the bracelet. I'm not sure how comfortable it will be having the brad ends on the inside of the bracelet, but I'm going to try it out.

This one was painted with blue paint and sponged with blue ink. I used a pearl paint on this one as well. The big metal flower is a decorative grommet from We R Memory Keepers. After setting the grommet, I sewed a button in the center.

This is my other favorite. It was painted with tan paint and inked with brown ink. The cork button is from Pink Paislee's Queen Bee line. I sewed it and the tan button onto the bracelet.

If you try these out, I'd love to see them. Just leave a link in the comments.

Wednesday, July 28, 2010

Sun Kissed Summer Book Class

Many of you know that I am on my local scrapbook store's in-store design team (A Walk Down Memory Lane). I created the above flip book with Bo Bunny Sun Kissed Papers (don't tell Lisa I spilled the beans early, but Bo Bunny will be AWDML's featured manufacturer for August, which means you can get all the Bo Bunny goodness you can handle for 25% off for the whole month of August) to be displayed at the store. So many people were asking about it that we've decided to turn it into a class. The class will be offered on Saturday, September 18. If you want to learn how to make this book, call AWDML at (712)476-3443 to register. If you can't attend the class ask about having a kit shipped to you, I'll be more than willing to make one up for you :-)

Tuesday, July 27, 2010

Breezy Point - All Inclusive Layouts

I have 2 different Layouts today, but both are made from Bella Blvd's All Inclusive line, and both use pictures of my oldest from our recent trip to my parents' lake home. The first layout is my own creation. The second layout is done with a page kit I won from Paisleys & Polka Dots Kits. Even though it's not truly my creation, I just had to share it because the kit is so fantastic, and easy to customize to fit the size and number of pictures I wanted on the layout.

My Layout (Lots of foam dimensionals were used in the making of this layout.):
Paisleys & Polka Dots Kit Layout (They also do some amazing mini-album kits. This kit is a bit different than a lot of kits because everything comes pre-cut for you.):A big thanks to Bella Blvd and Paisleys and Polka Dots for helping me get my summer memories in a layout so quickly. I hope you're finding the time to scrap a few of your fun summer memories too!

Thursday, July 22, 2010

Beach Bird Bungalo

Have you ever wondered where birds go on vacation (because let's face it, all that flying and eating worms can really be stressful)? Well, if you have, I think today I have the answer. They go here:
With 2 entry holes, there's enough room for the whole family. No squawking over who gets to enter first.
The active bird family can enjoy sailing.

While the more relaxed members can soak in the sun on the beach - lifeguard on duty.
And the whole family will enjoy the local sand castle contest.
The birdhouse template was cut with my Silhouette. The entire house was made with products from American Craft's Heat Wave line. The base of the house and the orange fringe is Tangerine Tidal Wave paper. The roof is made from Bodacious Banana paper. The house also uses Sandy Details Stickers, Shelly Details Stickers, Swell Remarks Stickers, Beach House Chipboard Shapes, and Wake Rub-ons.
Surfs Up!

Wednesday, July 21, 2010

Always Together

Woo Hoo! It's My Mind's Eye challenge time again! The sketch for the challenge looks like this:
The theme for the challenge is hope. One of my greatest hopes is that my boys will always be close, so I scrapped that hope like this:The journaling around the frame reads: I hope that you will always be great friends... and want to spend your time together.
The papers are My Mind's Eye Breaking Free Lighten-Up, Baby! "Best Buds", "Full Speed Ahead", and "Brothers". The tickets, rub-ons, and frame are also from the Breaking Free Collection. The papers in this collection are soft, masculine, and weathered. They make scrapping outdoor stuff easy, and I'm loving this color palette for my boys. The buttons are a little bit of everything I had in my button drawer. All of the stitching is free hand.
If you want more info on playing along, you can check out the challenge details here.

Tuesday, July 20, 2010

The Boys of Summer

There are some moments in life you set out to capture (birthdays, holidays, a trip to the zoo, for example), and then there are the moments in life that you just stumble upon and are so happy to have your camera near by. This was one of those moments. I looked out in my backyard a while back and saw this:
Bo Bunny issued a Layout Challenge to use a TV or movie title for your layout. You can find all the details here. I thought the movie title "The Boys of Summer" worked so well for this one. The paper, brads, and button are all from Bo Bunny's Sun Kissed Line. If you didn't see yesterday's card that uses this line too, you can click here to see it. The details along the bottomand the journalingare all attached with foam dimensional adhesive to give the layout some more texture. The stitching is done by hand.
I hope you're all having a lot of spontaneous summer fun, too!

Monday, July 19, 2010

Monday Sunshine

I thought I bring you a little sunshine to brighten your Monday.


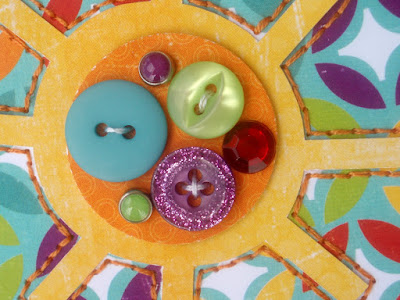
I love this line from Bo Bunny. It's called Sun Kissed. At first I didn't really think I needed a lot of this paper, so I just bought a few pieces...the first time. It so bright, bold, and fun that I ended up heading back to my LSS (A Walk Down Memory Lane) almost immediately for more. The buttons and brads on this card are also from the Sun Kissed Collection. I cut the sun and the orange layer using my Silhouette. To help the sun stand out, I stitched an orange border around it. The greeting is from a new stamp company called Lawn Fawn and the set is called Partly Cloudy. The greeting was stamped with Versamark and embossed with American Craft's Embossing Powder (color Cricket).
Wishing you a sunny week!

Thursday, July 15, 2010

A Few Challenges

It's summer, and I know you're busy so here are a few things to get your creative juices flowing.
This example has a few purposes. First, if you take my Basic Grey Card Class at A Walk Down Memory Lane on July 24 (details in the right hand column), you'll get to make this card. It's also an entry for Moxi Fab's Clean and Simple Card Challenge. All week Moxie Fab is having card style challenges. Click here to check them out and play along.
The papers and buttons are from Basic Grey and the stamp is from Technique Tuesday (which just happens to be 25% off this month at AWDML).
Up next is a little layout inspiration. On the 15th of the Month Scraptiv!ty posts a layout sketch on-line with 3 examples. 1 example was made by me: You can check out the sketch and the other examples by clicking here. This was a bit of a step outside my comfort zone. I don't usually do shabby chic layouts, but I think this one turned out well. All of the paper, ribbon, buttons, journaling stickers, and miscellaneous accessories are from Chatter Box. I used a gold gel pen to journal and to outline the edges of my patterned papers. Thanks for stopping by for a little inspiration.

Saturday, July 10, 2010

Chirp, chirp, chirp...

Yes, that's the sound of crickets on my blog! Whew, sometimes it takes a bit to get back into the swing of things after vacation. But, I've been working diligently on a few things to share with you over the next few weeks. Today, though, I wanted to catch you up on what's going on and share some cards that I made at my last card class. If you're in the area of A Walk Down Memory Lane come by and check out one of my classes some time and you can make fun cards like these, too. This card uses paper from Like Father Like Son from Fancy Pants, Artisan Tape from Pink Paislee, and stamps from Technique Tuesday. All Technique Tuesday stamps are 25% off at A Walk Down Memory Lane this month.
This card also uses stamps from Technique Tuesday. The "missing you" stamp is from Cornish Heritage Farms. The paper is from Bella Blvd All Inclusive Line.

This last card uses papers from one of my favorite new companies, Echo Park. Their papers are just perfect for summer! The stamp is from Unity Stamp Company, and the border punch is Apron Lace from Fiskars.

Finally, I'd like to remind you to stop by Scraptiv!ty this summer. You can check out the great sales they have going on all summer long here on the blog. Also, check out the forum here, for some great summer contests and project ideas from the design team.

Here's to getting back into the swing of things!