Saturday, April 24, 2010

Thanks to our Soldiers

This year I headed up the service project for our local MOPS (Mothers of Preschoolers) group, because it's something I'm very passionate about. We collected items and letters of support to send to our soldiers overseas. There's a great website called anysoldier.com that we're using for contact info for those brave men and women who put themselves in harm's way. Most of the soldiers enjoy getting care packages, but what they seem to love the most are the letters and cards, so we're making sure there are plenty of those in the boxes. Here are 2 cards I mad for just that purpose:
They are based off of this card sketch from Paper Crafts Go To Sketches:
There is a fun card contest going on over at Moxie Fab World using the above sketch. If you want to play along, you can find all the details here.
Just a quick note on the products used; the paper is Pink Paislee's 365 Degrees. My local scrap store (A Walk Down Memory Lane) got it in and I just *had* to have the 6 x 6 pad. I also picked up a set of the Queen Bee Cork Buttons, as you can see above. I've just started playing around with them, and oh my are they fun! So far I've stamped on them (which works well), used them plain, and put a brad through them. The cork held up really well when I punched it with my crop-a-dile. I've found that a strong liquid glue (Scrappy Glue, Tombow Multi, etc.) secures these nice and snug to your paper. Just a quick little review there, for those of you wondering about this new and unique product.

Thursday, April 22, 2010

Mama-Razzi

I received my April Scraptivi!ty kit full of Bo Bunny Mama-razzi papers about a month ago now, and I still can't get enough of this line. It even inspired me to start blog stalking Bo Bunny. Guess what I found out? Bo Bunny's having an ad inspiration layout challenge right now. You can find all the details here.
I found this add and thought it would translate to a layout so well, I just love the clean lines:

Here's the layout I came up with:
Supplies:
Papers - Bo Bunny Mama-Razzi: Stripe, Flash, and Dot
Rub-ons - Bo Bunny Mama-Razzi
Card Stock: Core'Dinations Black Magic
Embellishments: Vanilla Ric Rac
Pebbles Inc Candy Dots

Wednesday, April 21, 2010

My Mind's Eye Challenge #10

I apologize for taking so long between posts. Life, you know? I've been paper crafting like crazy, although I haven't been able to post most of those creations, but today I have a page I did with My Mind's Eye's most recent sketch challenge. I play along with a few on-line challenges, but I've got to say the sketches that the Design Team over at MME comes up with are my favorite! The twist to this challenge is that you needed to use the song Dream Big Ryan Shupe & The RubberBand some way in the page. Here's the sketch:
Here's my layout:I've always loved these photos of Elias sleeping, and thought this was the perfect layout/theme challenge for them. The paper is all by My Mind's Eye Penny Lane Free Bird, as is the journaling tag. The brads are from MME's Lush line. The punched borders were done with 2 of my favorite Fiskars Border Punches; Apron Lace and Upper Crest. The title was done with American Craft Thickers.
I loved the colors of this page and the papers from Free Bird so much that I just had to make a companion page:
The "Godparents" tag was created on my Silhouette.
If you want to play along with the challenge too, you can find all of the details here.
Thanks for stopping by, I promise to be back with more paper fun soon!

Tuesday, April 13, 2010

Moxie Fab, Fab Friends, and Some Upcoming Fun

You know I love playing along with the challenges and Tuesday Triggers over at Moxie Fab World, well click here to check out this week's Tuesday Trigger creator at the Moxie Fab World. You might just see a project by someone you know (me!!!).

I just got done creating a layout that will be part of a gift scrapbook. The scrapbook chronicles this past year of MOPS (Mothers of Preschoolers), and will be given as a thank you gift to this year's coordinator. This page is of our steering team:
I used some of my favorite papers from Cosmo Cricket Earth Love. These papers are soft, pretty, and subtly girlie. I love them! I added some stitching around the edges using a Bazzill in stitch template. I used a scallop punch and a small hole punch to make the flowers. The letters are Thickers from American Crafts.
One more fun, and hidden, detail:
That little tag behind the photo pulls out for journaling. We're going to write a very heartfelt, very sappy thank you note to our coordinator on it and slip it back behind the photo.
I've made a companion page to this layout, but you'll have to wait until May 1 to see it. In case you didn't know May 1 is national scrapbooking day. There are lots of fun activities going on all over the paper crafting world. I'll be hosting a challenge over at Scraptiv!ty that uses that companion page. If you're in the northwest Iowa region that day you'll want to swing by A Walk Down Memory Lane where they have classes, crops, and a make and take (made by yours truly). Remember, friends don't let friends craft alone! I'd love to have you join me on-line or in person for some fun May 1.

Wednesday, April 7, 2010

Happily Ever After

On St. Patty's Day, I won a giveaway from the Fiskateers and Little Yellow Bicycle. It was a great sampling of LYB's new Lucky Me line. The shamrocks in this line make it fun for St. Patty's day, but the deep blues and greens and amazing word stickers make this line beautiful for year round photos, too. Now, there's a lot to love about this line, but I really fell in love with the sheet of card stock stickers.
The sayings are wonderful, and it's hard to see here, but there are lovely foil words and accents on the stickers.
I knew immediately that I wanted to use the sticker that says "living my Happily Ever After," so I built this page around that sentiment:
A few more notes about the page. The paper is LYB Lucky Me Green Tiny Dot, Stripe, and Denim Tiny Stripe. The clear overlay accents are also LYB Lucky Me. The stitching was done by hand. The brown and green pearl accents are from My Mind's Eye Lush line.

I'm sure feeling blessed to be living my Happily Ever After!

Tuesday, April 6, 2010

Birthday Bracelet

My sister celebrated her 30th Birthday at the end of March. After seeing the necklace in this post, she requested I make her something similar in a charm bracelet for her birthday. She also requested I put pictures of her nephews (my boys) in it. Well, I finally finished it and shipped it off today. I made 1 bracelet, but 3 sets of photos/pretty papers to put inside. The charms are double sided, so the photos below show both sides of the charm. Here they are:
Black and white photos with black, white, and gray paper, and a rhinestone accent make this an elegant option.

I used Stickles to add sparkle to the flowers on these charms.

Sepia photos and a pearl accent go well with My Mind's Eye's Ooh La La paper.

I printed the photos at home on photo paper. I had an easier time sizing them that way. I wanted to make sure my sister could handle the photos without smudging them up too badly, so I sprayed a clear coat sealer over the top. The bracelet and charms are from Stampin' Up!'s Simply Adorned line. All of the paper is from My Mind's Eye (Andrea Victoria, Ooh La La, and Pretty Please) .

Sunday, April 4, 2010

A Sketch With Flair

Are you a Fiskateer yet? You are? Yeah!!! You're not? What are you waiting for?!? If your asking yourself what the Fiskateers are, let me tell you a little about them. The Fiskateers are a community that shares a love of all things Fiskars. We share ideas, chat, post picture, etc. of our life and crafty endeavors. Love paper crafting? The Fiskateers are for you. Love sewing? The Fiskateers are for you. Can't live without your Fiskars scissors and border punches? The Fiskateers are definitely for you. Have I convinced you yet? Want to be a Fiskateer? Click here and this link will take you to the 5 Fisk-a-leads. E-mail any one of them, let them know that Samantha T. #6363 told you the Fiskateers community was the best place to talk crafting. They'll let you know more about the Fiskateer and even get you hooked up with your very own Fiskateer number.
Why all the Fisk-a-love today? Well, last week Sunday Fiskateer Rebecca set up an on-line chat with Allison Davis (chats like this are just 1 of the reasons I love being a Fiskateer). Allison's written a bunch of really fantastic sketch books. During the chat Allison issued a sketch challenge, and here's what I came up with:
Now to talk about the products used. The only non-American Craft item here is was the Fiskars Upper Crest border punch that I used on the Bodacious Banana paper. Everything else is from American Craft's Heat Wave line. The bright, sunny colors went perfectly with my summer back yard pool pictures. Here's a run down of what I used:
Paper: Pretty Papaya, Maverick Mango, Bodacious Banana, and Creamy Coconut
Flair (you know, those great button shaped accents): Surfs Up and Day in the Sun
Details: Sandy (don't you just love that camera? I think it's my favorite accent on the whole page!)
Remarks: Surfboard (self-adhering chip board)
Beach House: Heat Wave (chip board accent)

Friday, April 2, 2010

Scraptiv!ty April Kit Part 2

Today I have 2 more projects made with the April Scraptiv!ty kit.
This layout again uses the altered photo technique. Here I printed the larger photo directly onto patterned paper:
The second project is a mini-album. I take so many pictures of my boys, but usually am not in many pictures with them (I know you can relate!), so I decided to do a mini-album of just pictures of me with my boys. The pictures are printed on canvas to give them a shabby chic feel. Both the Bo Bunny Edgy Album and the pre-cut Mama-razzi papers can be added on to the April kit.

Thursday, April 1, 2010

Scraptiv!ty April Kit Part 1

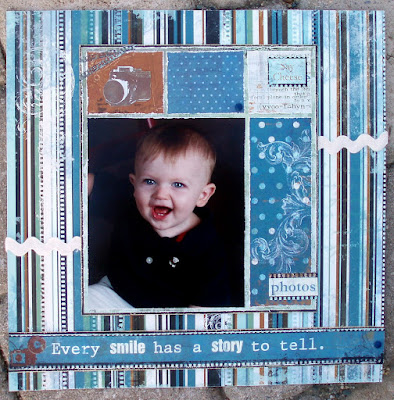
It's Scraptiv!ty Kit release time for April, no foolin'!!! I'm pretty sure this is my favorite kit yet. This kit features papers from Bo Bunny's Mama-razzi line. I love the mix of blues, browns, greens, and black and the photo/camera theme. Equally fun is this month's technique of different ways to alter photos.
First up is a layout:
I altered the photo by adding blue ink to the photo, journaling directly on it, and adding a rub-on to the corner of it. I used my Silhouette to cut the detail behind the photo.

Next up is a card:
I love how core'dinations card stock pops when you emboss and sand it!

The final project that I have for you today just may be my favorite:
I had my dear husband cut a 26" x 6 1/2"piece of wood. Then I painted it, and covered it in mama-razzi paper, photos, ink, and embellishments. Now I have a great piece of art for my wall. In fact, my husband is hanging it as I type this.
Come back tomorrow to see what else I created with this awesome kit!