My kiddos just keep getting older. I'm so thankful for this hobby every time I do a layout like this 11 years layout. It helps me freeze a little spot in time to remember who they are at right this exact moment in time.
I'm just about done using up my stash of American Crafts True Stories. There are a lot of great stickers and embellishments in this collection, so I had a lot to chose from for embellishments.
I love the little naked wood embellishments that are in a lot of American Crafts collections. You can paint, stain, or ink them as well, but I usually love the look of them just plain.
I love this snapshot of this kid! It's so him, right now at this moment.
Showing posts with label American Crafts. Show all posts
Friday, February 16, 2018
Thursday, February 1, 2018
Brothers Layout
I'm still working on getting through my paper stash. Today I'm stash busting with this Brothers Layout.
I've found that, when I'm using up my stash, I often don't have the alphabet stickers I need for creating titles (I always seem to be missing the vowels and the letters s and t). When that happens, I just pop open my computer and create a title with my Silhouette Cameo. From creation to cutting, it's often just as fast as trying to get individual alpha stickers placed in the right spot.
The paper from my stash that I'm busy using up is American Crafts True Stories. I grabbed some of the cork stickers for embellishments. With the wood background in the photo, I thought the natural look of the cork went well. I was even able to use one as part of the title.
More of the stash is used up, and I love seeing these two together on this Brothers Layout.
I've found that, when I'm using up my stash, I often don't have the alphabet stickers I need for creating titles (I always seem to be missing the vowels and the letters s and t). When that happens, I just pop open my computer and create a title with my Silhouette Cameo. From creation to cutting, it's often just as fast as trying to get individual alpha stickers placed in the right spot.
The paper from my stash that I'm busy using up is American Crafts True Stories. I grabbed some of the cork stickers for embellishments. With the wood background in the photo, I thought the natural look of the cork went well. I was even able to use one as part of the title.
More of the stash is used up, and I love seeing these two together on this Brothers Layout.
Labels:
American Crafts,
silhouette
Friday, January 19, 2018
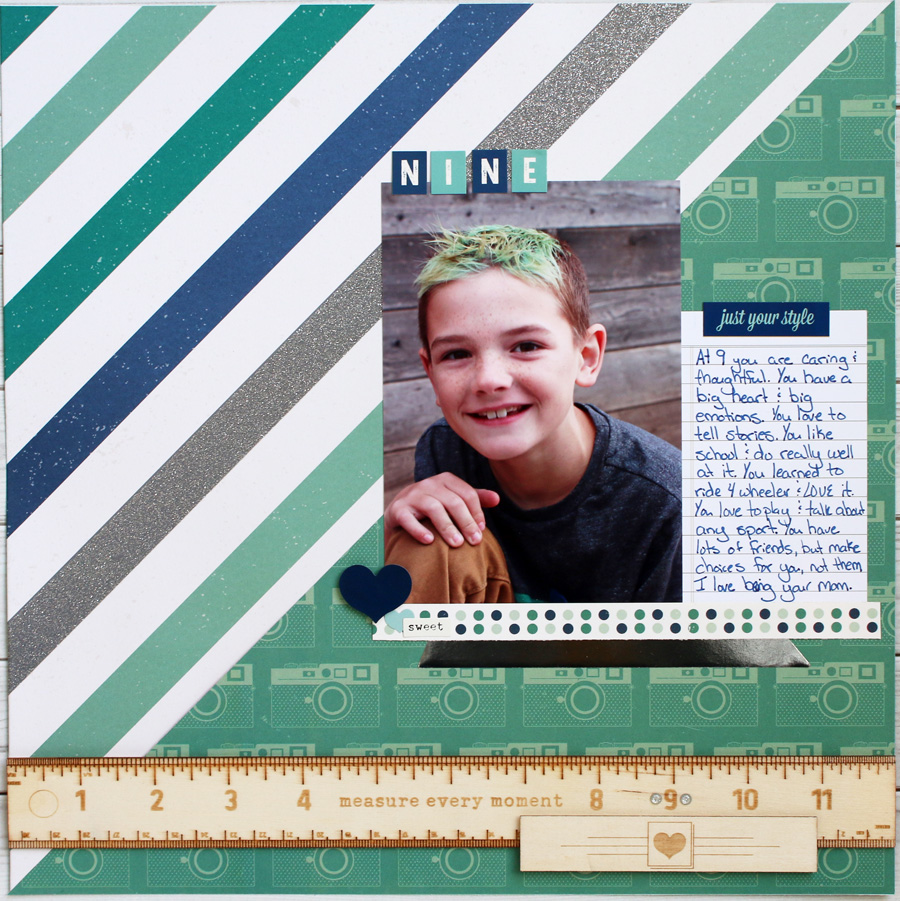
Nine Years Layout
I'm continuing to work through my stash of paper. I'm not a saver (when it comes to patterned paper), but some times I have so much of it that I accidentally end up with a huge stash anyways. My project today is a nine years layout of my younger son using American Crafts True Stories.
If you follow my blog, you know that I like to take my kids' photos every year and then do a layout about who they are at that age. They grow and change so much, it's kind of fun to look back and see what favorite things have changed or stayed the same over time and how they're growing as people.
As far as layout details go: I've always loved wood accents, but I've never been great at using them on layouts. This is probably the larges wood embellishment I've ever used. It worked out great for this layout. I left it unaltered, and just added some enamel dots right around the 9.
I can't believe this nine years layout is the last single digit layout I'll make for either of my kids. Do you mark the years any special way in your scrapbooking?
If you follow my blog, you know that I like to take my kids' photos every year and then do a layout about who they are at that age. They grow and change so much, it's kind of fun to look back and see what favorite things have changed or stayed the same over time and how they're growing as people.
As far as layout details go: I've always loved wood accents, but I've never been great at using them on layouts. This is probably the larges wood embellishment I've ever used. It worked out great for this layout. I left it unaltered, and just added some enamel dots right around the 9.
I can't believe this nine years layout is the last single digit layout I'll make for either of my kids. Do you mark the years any special way in your scrapbooking?
Labels:
American Crafts
Thursday, December 7, 2017
Kids and Dog Layout
Every year I take my kids' photos. I want the in time for the Christmas card, but I also love documenting in a bit more of a formal way how much they grow and change (and some times stay the same) every year. This year we mixed it up a bit and added our dog, Steve, to some of the photos. Today I have a kids and dog layout to share.
The photos with Steve were some of my favorite. Not only because he hammed it up in the photos, but because my kids actually smiled for real and looked natural and relaxed. Steve really is part of the family, and I'm so glad that we'll have these photos forever.
I'm trying to work through my rather large stash of paper (mostly so I have room to buy more). I dipped back into my stash of American Crafts True Stories. It may be a bit old, but man do I love the colors in this collection. I have a ton of True Stories and it's far too good to toss, so I decided to pull it back out for another round of paper crafting. You'll see it popping up in my layouts for the next month or so.
Oh, these photos! They just make me smile. Have you ever included a family pet in your annual photos?
The photos with Steve were some of my favorite. Not only because he hammed it up in the photos, but because my kids actually smiled for real and looked natural and relaxed. Steve really is part of the family, and I'm so glad that we'll have these photos forever.
I'm trying to work through my rather large stash of paper (mostly so I have room to buy more). I dipped back into my stash of American Crafts True Stories. It may be a bit old, but man do I love the colors in this collection. I have a ton of True Stories and it's far too good to toss, so I decided to pull it back out for another round of paper crafting. You'll see it popping up in my layouts for the next month or so.
Oh, these photos! They just make me smile. Have you ever included a family pet in your annual photos?
Labels:
American Crafts
Monday, August 1, 2016
Basketball Box Card
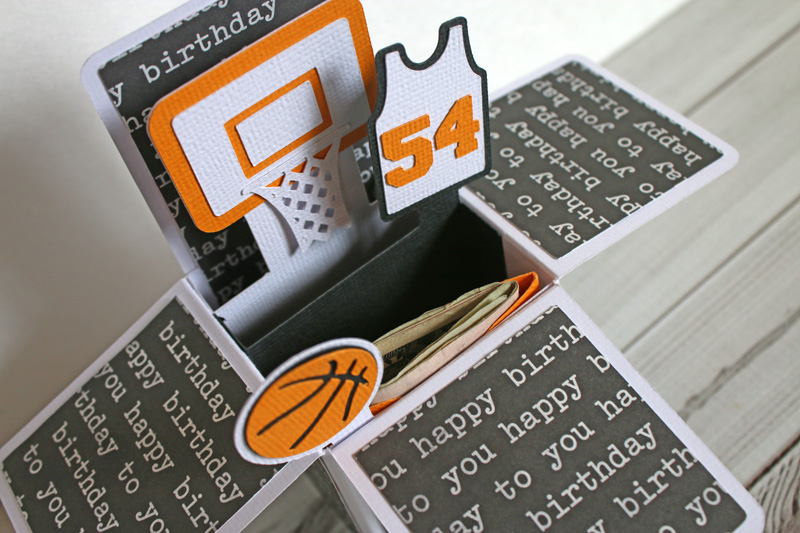
I love making 3-D box cards with my Silhouette. They're pretty easy to make, are super customizable, and are just darn cute. One of my nephews just turned 17 over the weekend, so I whipped up a basketball box card for him.
Not only does he love basketball, but he's pretty good player, too! Our school colors are orange and black, so that made color choice easy for me. I wanted to make sure it felt like a birthday card, too so I decorated the box with some coordinating black and white birthday paper from Pebbles Inc Birthday Wishes.
I needed somewhere to stash a little birthday money, so I created a small pocket with the We R Memory Keepers 123 Punch Board and stuck it inside the box, too.
One more note about these box cards, they fold down flat, so you can mail them! If you have a Silhouette, check out the box cards in the online store. They really are fun and easy to make. If you have made one I'd love to hear what theme you made!
Not only does he love basketball, but he's pretty good player, too! Our school colors are orange and black, so that made color choice easy for me. I wanted to make sure it felt like a birthday card, too so I decorated the box with some coordinating black and white birthday paper from Pebbles Inc Birthday Wishes.
I needed somewhere to stash a little birthday money, so I created a small pocket with the We R Memory Keepers 123 Punch Board and stuck it inside the box, too.
One more note about these box cards, they fold down flat, so you can mail them! If you have a Silhouette, check out the box cards in the online store. They really are fun and easy to make. If you have made one I'd love to hear what theme you made!
Labels:
American Crafts,
pebbles inc,
silhouette,
We R Memory Keepers
Tuesday, July 5, 2016
Sweet Summer Mini Alphabet Punchboard Banner
This is a personal blog. All editorial content and projects are
intellectual property of Taylor Stamped. I receive financial
compensation and material product from American Crafts to develop my craft posts, but all ideas and opinions are my own.
I got my hands on the new We R Memory Keepers Mini Alphabet Punch Board, and have had some time to play around with it now. You guys, it is so much fun! There are so many ways to use these smaller letters; cards, layouts, party decor...and today I'm using it to make a Sweet Summertime Mini Alphabet Punchboard banner.
This board works just like the original Alphabet Punch Board, but starts with 1 1/2" x 2 1/2" rectangles of paper for a smaller set of letters. It's super easy to use, and becomes really intuitive after a few letters...but don't worry if it doesn't become intuitive, there's a step by step guide for making each letter.
It only took me a few minutes to create my letters for my Sweet Summer banner with the Mini Alphabet Punch Board. Since creating the letters was so fast, I decided to dress them up with a few summery icons.
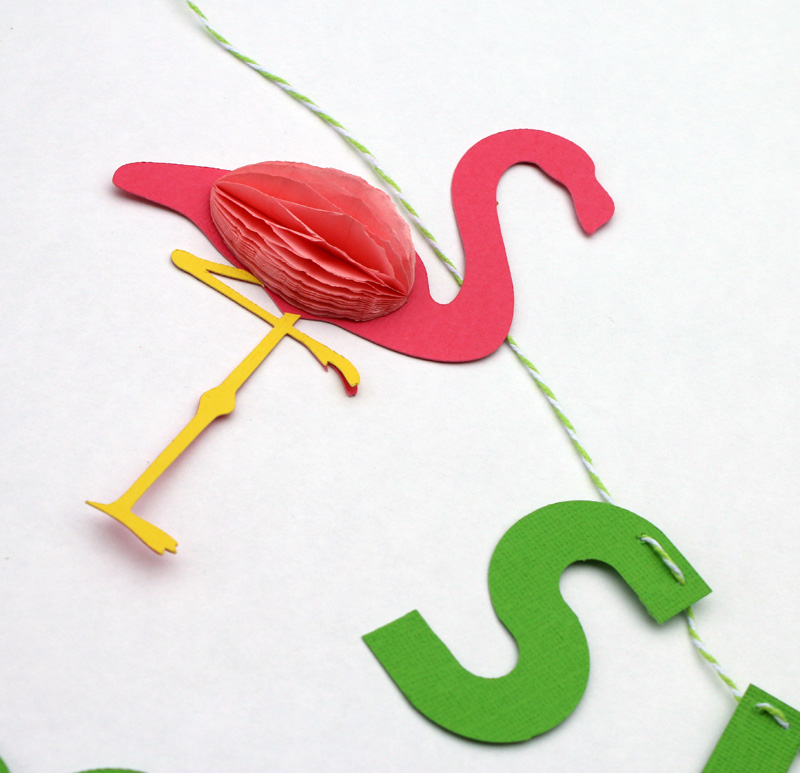
I used my Silhouette Cameo to cut some flamingos and pineapples, because what says summer more than flamingos and pineapples?
Then I added some fun dimension to them with the We R Memory Keepers Honeycomb Stencils and some Honeycomb paper (yellow for my pineapples and pink for my flamingos). They turned out so cute! A little honeycomb paper adds so much.
I pierced little holes through each letter, and used some bakers twine to string it all up. Now I have a bright new summer banner to hang up.
If you're loving this new Mini Alphabet Punchboard, you can pick it up from HSN on July 6. HSN is having a 24 hour craft event on July 6, and there will be live demonstrations during the day of this super fun and versatile new tool. You'll be able to see live how easy it is to use (and order one for yourself!).
I got my hands on the new We R Memory Keepers Mini Alphabet Punch Board, and have had some time to play around with it now. You guys, it is so much fun! There are so many ways to use these smaller letters; cards, layouts, party decor...and today I'm using it to make a Sweet Summertime Mini Alphabet Punchboard banner.
This board works just like the original Alphabet Punch Board, but starts with 1 1/2" x 2 1/2" rectangles of paper for a smaller set of letters. It's super easy to use, and becomes really intuitive after a few letters...but don't worry if it doesn't become intuitive, there's a step by step guide for making each letter.
It only took me a few minutes to create my letters for my Sweet Summer banner with the Mini Alphabet Punch Board. Since creating the letters was so fast, I decided to dress them up with a few summery icons.
I used my Silhouette Cameo to cut some flamingos and pineapples, because what says summer more than flamingos and pineapples?
Then I added some fun dimension to them with the We R Memory Keepers Honeycomb Stencils and some Honeycomb paper (yellow for my pineapples and pink for my flamingos). They turned out so cute! A little honeycomb paper adds so much.
I pierced little holes through each letter, and used some bakers twine to string it all up. Now I have a bright new summer banner to hang up.
If you're loving this new Mini Alphabet Punchboard, you can pick it up from HSN on July 6. HSN is having a 24 hour craft event on July 6, and there will be live demonstrations during the day of this super fun and versatile new tool. You'll be able to see live how easy it is to use (and order one for yourself!).
Labels:
American Crafts,
silhouette,
We R Memory Keepers
Wednesday, June 29, 2016
Mixing Collections
Today I'm mixing collections a bit to create the 2 page layout I wanted. I often mix in embellishments from a different paper collection, but it's not terribly often that I use two different paper collections for one layout.
To compliment my photos of our visit to Newgrange, I wanted a mix of blues and greys. To accomplish that, I pulled papers from both American Crafts True Stories and Pink Paislee Atlas. To make everything flow nicely, I made sure to use embellishments from both collections as well.
We had a bit of a drive to Newgrange from Northern Ireland, so we got up early to be part of one of the first tours of the day. The fun little coffee cup "its a new day" die cut from True Stories was just too cute to pass up, and fits as a nice little reminder of our early start.
Do you like mixing collections, or do you usually stick to paper all from the same collection when you scrap?
To compliment my photos of our visit to Newgrange, I wanted a mix of blues and greys. To accomplish that, I pulled papers from both American Crafts True Stories and Pink Paislee Atlas. To make everything flow nicely, I made sure to use embellishments from both collections as well.
We had a bit of a drive to Newgrange from Northern Ireland, so we got up early to be part of one of the first tours of the day. The fun little coffee cup "its a new day" die cut from True Stories was just too cute to pass up, and fits as a nice little reminder of our early start.
Do you like mixing collections, or do you usually stick to paper all from the same collection when you scrap?
Labels:
American Crafts,
pink paislee
Tuesday, June 14, 2016
Mickey Father's Day Card
We're kind of Disney-a-holics in our family. I thought it would be fun to make a Mickey Father's Day Card for my dad this year. I used my Silhouette Cameo to create my Mickey Mouse inspired card.
I was love all the possibilities for the the classic mickey shape, and thought it would be fun to have mickey wearing a tie. Creating a classic Mickey inspired head is super simple in the Cameo software. You just have to create 3 circles, overlap them, and weld them together.
I used a plain tie cutting file from the Silhouette store to add a tie to my Mickey, and then decided that Mickey would (of course) have a mickey head on his tie.
Waltograph from dafont.com is my favorite font for cutting Disney looking letters. I cut Happy Father's Day in Waltograph on American Crafts white card stock. I added some pops of patterned paper from Pebbles Inc Birthday Wishes. I stretched outside the classic black, red, and yellow Mickey colors and went with a blue, black, and orange color theme for the card.
Do you have Disney-a-holics in your family too? I'm not sure why I haven't tried this sooner. After how cute this Mickey Father's Day card turned out, I know there are a few more Mickey inspired cards in my future!
I was love all the possibilities for the the classic mickey shape, and thought it would be fun to have mickey wearing a tie. Creating a classic Mickey inspired head is super simple in the Cameo software. You just have to create 3 circles, overlap them, and weld them together.
I used a plain tie cutting file from the Silhouette store to add a tie to my Mickey, and then decided that Mickey would (of course) have a mickey head on his tie.
Waltograph from dafont.com is my favorite font for cutting Disney looking letters. I cut Happy Father's Day in Waltograph on American Crafts white card stock. I added some pops of patterned paper from Pebbles Inc Birthday Wishes. I stretched outside the classic black, red, and yellow Mickey colors and went with a blue, black, and orange color theme for the card.
Do you have Disney-a-holics in your family too? I'm not sure why I haven't tried this sooner. After how cute this Mickey Father's Day card turned out, I know there are a few more Mickey inspired cards in my future!
Labels:
American Crafts,
Disney,
pebbles inc,
silhouette
Monday, June 6, 2016
Using Printed Vellum on a Layout
There are so many fun ways to use vellum! Today I'm sharing a really simple way for using printed vellum on a layout. I'm using it as an overlay over patterned paper.
American Crafts True Stories has some really fun printed vellum in it that I wanted to use. It was too pretty to cut up, so I decided to use the whole piece as my background for my layout. If you look at the picture above, the vellum is printed with all those fun clouds. To make those clouds really pop, I laid the vellum over another piece of patterned paper. The patterned paper is white with teeny tiny little aqua dots all over it.
You can see the dots from the patterned paper under the vellum pretty well in the photo above. To keep with the pin dot theme, I used patterned paper with pin dots on it to mat my photos.
When working with vellum, you need an extra strong adhesive. Liquid glue would work, but I've never been much for the mess and drying time of liquid glue. A fabulous, mess free alternative is Glue Dots. I used the Ultra Thin Glue Dots to attach everything to the vellum, and they're holding strong.
If you haven't tried using printed vellum on a layout, using the entire sheet as an overlay over a simple piece of patterned paper is a great way to start. It'll give your entire layout a soft look that you'll love!
American Crafts True Stories has some really fun printed vellum in it that I wanted to use. It was too pretty to cut up, so I decided to use the whole piece as my background for my layout. If you look at the picture above, the vellum is printed with all those fun clouds. To make those clouds really pop, I laid the vellum over another piece of patterned paper. The patterned paper is white with teeny tiny little aqua dots all over it.
You can see the dots from the patterned paper under the vellum pretty well in the photo above. To keep with the pin dot theme, I used patterned paper with pin dots on it to mat my photos.
When working with vellum, you need an extra strong adhesive. Liquid glue would work, but I've never been much for the mess and drying time of liquid glue. A fabulous, mess free alternative is Glue Dots. I used the Ultra Thin Glue Dots to attach everything to the vellum, and they're holding strong.
If you haven't tried using printed vellum on a layout, using the entire sheet as an overlay over a simple piece of patterned paper is a great way to start. It'll give your entire layout a soft look that you'll love!
Labels:
American Crafts,
Glue Dots
Tuesday, May 31, 2016
Three Photo Layout
Hello! Today I want to share one of my favorite ways to put together a three photo layout. I find myself using this general layout anytime I have 3 photos that go the same direction.
For those of you who prefer to see this broken down into its basic parts, I've whipped up a quick sketch of the layout.
Let's talk about a few of the ways you can change this basic layout up. If you rotate the sketch 90 degrees you've got a great layout for horizontal photos. Here I used 4x6 photos, but if you print one size smaller (3 1/2 x 5) you'll end up with some extra space for matting your photos with paper. You can use 2 photos and substitute a journaling spot for the third photo. Add extra layers of paper behind the photos for more dimension.
This layout was part of a much larger section in my book, so I had no need of a title and journaling, but a title could easily be added to the top of this layout, and journaling to the bottom right hand area.
I used some Pop Up Glue Dots to pop the center photo up from the rest of the page. It's a great way to add some dimension to the layout and put a little extra focus on one of the photos.
The paper and embellishments for this layout came from American Crafts True Stories collection. I've been using True Stories a lot for travel photos, but it's a great all occasions collection!
I actually have some more layouts sitting on my "to be photographed for the blog" using this basic three photo layout sketch. Do you have a go to layout that you use a lot? To be honest, it took me a bit to even realize I was doing it because this sketch is so customizable!
For those of you who prefer to see this broken down into its basic parts, I've whipped up a quick sketch of the layout.
Let's talk about a few of the ways you can change this basic layout up. If you rotate the sketch 90 degrees you've got a great layout for horizontal photos. Here I used 4x6 photos, but if you print one size smaller (3 1/2 x 5) you'll end up with some extra space for matting your photos with paper. You can use 2 photos and substitute a journaling spot for the third photo. Add extra layers of paper behind the photos for more dimension.
This layout was part of a much larger section in my book, so I had no need of a title and journaling, but a title could easily be added to the top of this layout, and journaling to the bottom right hand area.
I used some Pop Up Glue Dots to pop the center photo up from the rest of the page. It's a great way to add some dimension to the layout and put a little extra focus on one of the photos.
The paper and embellishments for this layout came from American Crafts True Stories collection. I've been using True Stories a lot for travel photos, but it's a great all occasions collection!
I actually have some more layouts sitting on my "to be photographed for the blog" using this basic three photo layout sketch. Do you have a go to layout that you use a lot? To be honest, it took me a bit to even realize I was doing it because this sketch is so customizable!
Labels:
American Crafts,
sketch
Thursday, May 19, 2016
Scrapping Memorabilia
Scrapping memorabilia can get a bit tricky, especially when it's something large and/or brightly colored. Today I have a page I created that contains a map and an admission ticket that I wanted to scrap.
As you can see, there isn't a photo on this page. I wanted to scrap the map of Giant's Causeway, as it helps put the path we took and locations of our photos into context. Since the map is pretty busy, I kept my color scheme pretty simple. All of the paper, embellishments, and alphas are from American Crafts True Stories collection. The film strips on the base paper are actually glittered, so it adds a bit of pizazz without making the layout too busy.
Since the map was on this page, it seemed like a great place to put one of our admission tickets as well.
I pulled all the colors in the layout together by using some fun multicolored Thickers.
This memorabilia page was part of a 2 page spread. While these pages don't necessarily make one large 12 x 24 page, I wanted the 2 pages to coordinate together in the book. I made that work by using some of the same papers on both pages and using the same alphas for the titles. You can see more about the right hand layout here. Do you have any tips and tricks for scrapping memorabilia?
As you can see, there isn't a photo on this page. I wanted to scrap the map of Giant's Causeway, as it helps put the path we took and locations of our photos into context. Since the map is pretty busy, I kept my color scheme pretty simple. All of the paper, embellishments, and alphas are from American Crafts True Stories collection. The film strips on the base paper are actually glittered, so it adds a bit of pizazz without making the layout too busy.
Since the map was on this page, it seemed like a great place to put one of our admission tickets as well.
I pulled all the colors in the layout together by using some fun multicolored Thickers.
This memorabilia page was part of a 2 page spread. While these pages don't necessarily make one large 12 x 24 page, I wanted the 2 pages to coordinate together in the book. I made that work by using some of the same papers on both pages and using the same alphas for the titles. You can see more about the right hand layout here. Do you have any tips and tricks for scrapping memorabilia?
Labels:
American Crafts
Monday, May 16, 2016
Mixing Pocket Pages in with Standard Pages
I don't do a lot of pocket style scrapbooking. However, when I scrap travel photos I like mixing in pocket pages with standard pages. Sometimes I have a lot of scenery photos that are similar, or from the same place, so I don't have journaling for every page, but I still want to print and scrap all of the photos. Here's an example of how I mix pocket pages in with standard pages.
As you can see, the page on the left is very simple. I filled the whole page with 4x6 photos, and just added a few stickers to accent the photos.
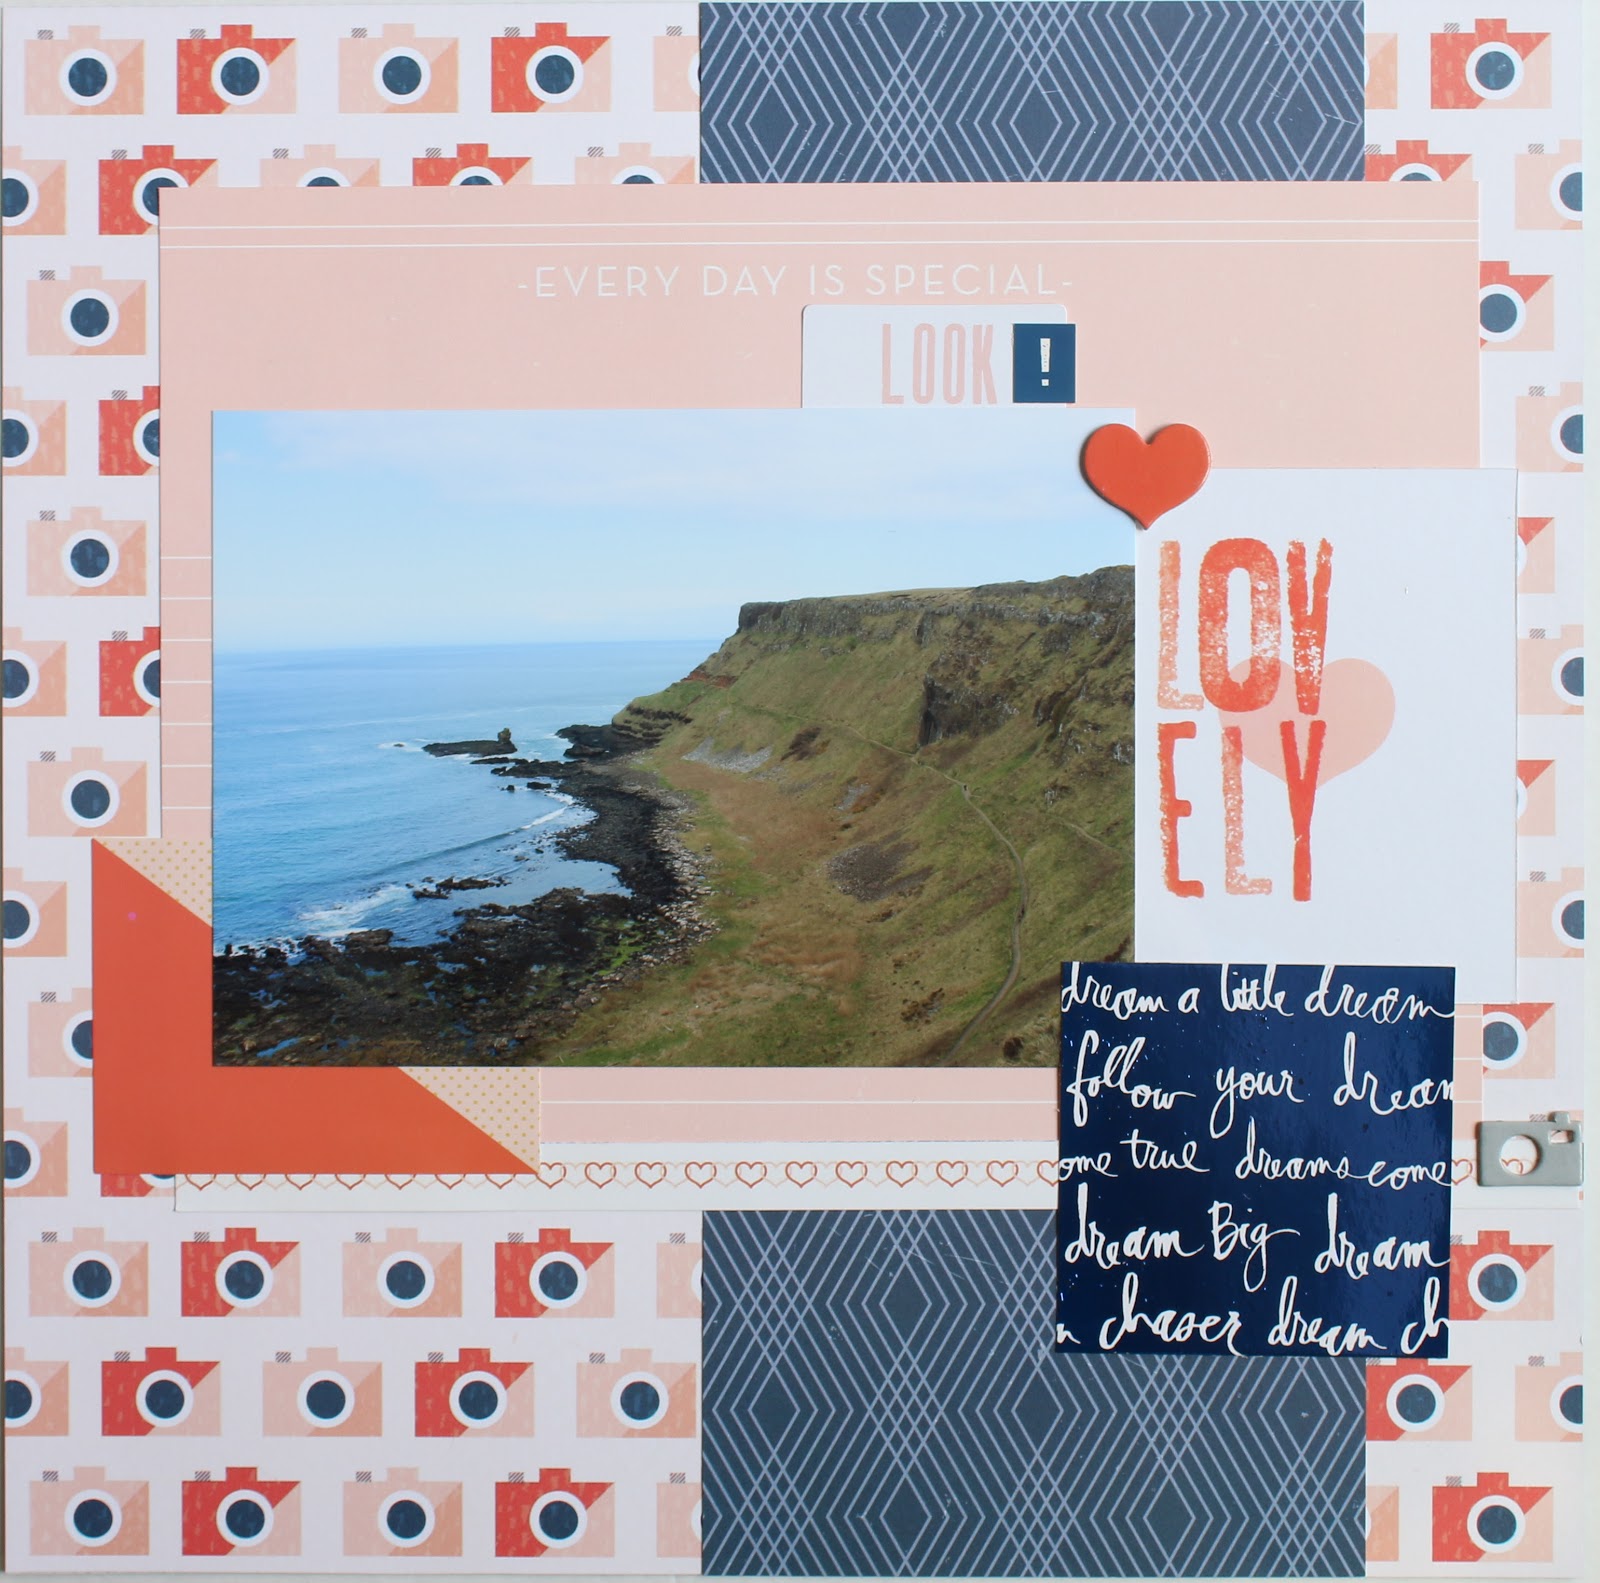
I focused more on the right hand side of the spread. I used American Crafts True Stories to scrap my larger 5x7 photo of Ireland's Giant's Causeway.
I foiled some Heidi Swapp Minc cards with blue foil to add a little extra pop to the page. I love using foil to add a little extra something to my page and love that you can use the Minc to customize your foil color to whatever works with your layout.
Do you do much pocket style scrapbooking? How do you utilize pocket pages?
As you can see, the page on the left is very simple. I filled the whole page with 4x6 photos, and just added a few stickers to accent the photos.
I focused more on the right hand side of the spread. I used American Crafts True Stories to scrap my larger 5x7 photo of Ireland's Giant's Causeway.
I foiled some Heidi Swapp Minc cards with blue foil to add a little extra pop to the page. I love using foil to add a little extra something to my page and love that you can use the Minc to customize your foil color to whatever works with your layout.
Do you do much pocket style scrapbooking? How do you utilize pocket pages?
Labels:
American Crafts,
Heidi Swapp
Friday, May 6, 2016
You and Me Layout
One of the things I love about scrapping is that I get to slow down and look at my photos. I get to feel all the feels from the time we too the photo all over again. My husband and I don't take a lot of photos together, so I tend to get especially sentimental scrapping photos of us. I really love this guy, and I hope I put some of hose feelings into today's You and Me Layout.
I used American Crafts True Stories for this layout. I love the piece of paper I used for the base of this layout, not only is it a gorgeous stripe, but that silver stripe is actually glittered. It's such a fun little something extra on the page!
Since the location that we took this selfie was so beautiful, I wanted to make sure it could be seen well. I decided to go with a larger 5x7 photo for this layout.
I matted the photo with a few different different pieces of patterned paper, playing off the colors form the stripes. I clustered some stickers and embellishments around the corners of the photo to draw the eye towards the photo. I also added a photo overlay, but placed it only in the upper left hand corner of the photo.
Finally, I used the True Stories Thickers to add the You and Me title to my layout. I loved journaling the story of this photo and scrapping it, too!
I used American Crafts True Stories for this layout. I love the piece of paper I used for the base of this layout, not only is it a gorgeous stripe, but that silver stripe is actually glittered. It's such a fun little something extra on the page!
Since the location that we took this selfie was so beautiful, I wanted to make sure it could be seen well. I decided to go with a larger 5x7 photo for this layout.
I matted the photo with a few different different pieces of patterned paper, playing off the colors form the stripes. I clustered some stickers and embellishments around the corners of the photo to draw the eye towards the photo. I also added a photo overlay, but placed it only in the upper left hand corner of the photo.
Finally, I used the True Stories Thickers to add the You and Me title to my layout. I loved journaling the story of this photo and scrapping it, too!
Labels:
American Crafts
Monday, March 28, 2016
Derry at Night Layout
This is a personal blog. All editorial content and projects are
intellectual property of Taylor Stamped. I do receive financial
compensation and material product from A Walk Down Memory Lane to develop my craft posts, but all ideas and opinions are my own. Some links are affiliate links.
Sometimes there is a city that you just have to photograph during the day and at night. We arrived in Londonderry durning the day, but I knew I'd just have to go out again after it got dark to capture some of the views of this beautiful city. Today I'm sharing my Derry at Night layout.
Thanks to the location of our hotel, the City Hotel, all we had to do was walk out the front door to be able to capture places like the Peace Bridge and the Guild Hall at night. We could actually see these views right from our hotel window, but I wanted to get a little more up close and personal.
I used a bit of a strange mix of papers for this layout. I started with the night sky/stars paper. I actually had it for scrapping camping photos as it's from Bella Blvd's Camp Out collection, but I knew it could be really fun for this layout.
I love how navy and kraft look together, so I pulled a piece of kraft and gold paper from American Crafts. For the border I thought I might be able to get away with a black chevron from Pebbles Inc. It helps pull in the black from the star paper without being too dark.
I needed to bring all of these papers together with some cohesive embellishments. Simple Stories Gold Snap Pack has kraft, black, gold, and white all in the mix of journaling cards and embellishments, so I used those. Little clusters of these kraft, gold, black, and white embellishments really help pull everything together.
We really loved our quick stay in Derry. Photographing Derry at night was just the thing to end a fabulous day there. Is there a city you love even more at night than during the day time?
Sometimes there is a city that you just have to photograph during the day and at night. We arrived in Londonderry durning the day, but I knew I'd just have to go out again after it got dark to capture some of the views of this beautiful city. Today I'm sharing my Derry at Night layout.
Thanks to the location of our hotel, the City Hotel, all we had to do was walk out the front door to be able to capture places like the Peace Bridge and the Guild Hall at night. We could actually see these views right from our hotel window, but I wanted to get a little more up close and personal.
I used a bit of a strange mix of papers for this layout. I started with the night sky/stars paper. I actually had it for scrapping camping photos as it's from Bella Blvd's Camp Out collection, but I knew it could be really fun for this layout.
I love how navy and kraft look together, so I pulled a piece of kraft and gold paper from American Crafts. For the border I thought I might be able to get away with a black chevron from Pebbles Inc. It helps pull in the black from the star paper without being too dark.
I needed to bring all of these papers together with some cohesive embellishments. Simple Stories Gold Snap Pack has kraft, black, gold, and white all in the mix of journaling cards and embellishments, so I used those. Little clusters of these kraft, gold, black, and white embellishments really help pull everything together.
We really loved our quick stay in Derry. Photographing Derry at night was just the thing to end a fabulous day there. Is there a city you love even more at night than during the day time?
Labels:
American Crafts,
Bella Blvd,
pebbles inc,
Simple Stories
Subscribe to:
Posts (Atom)