Wednesday, August 22, 2012
Let's Celebrate
It's been a little while since I've posted a card, so I figured why not break out something I haven't used for a long time - my watercolor pencils! I embossed watercolor paper with a lattice background stamp, then I colored stripes with my watercolor pencils, blending with water as I went. When I was done blending the color, I used a dry paper towel to wipe the color off of the embossed area.
I used Nestabilites dies to create a framed cut out. Inside the cutout, I stamped "Let's Celebrate" from Lawn Fawn's Sopihie's Sentiments (little side note, this was my first ever Lawn Fawn set, and it's still one of my favorites). I stamped it twice withouth re-inking to try in give it a soft, shadowed look to go along with teh soft background.
I stamped the pinwheels from Lawn Fawn's Cruising Through Life with Staz-on ink on watercolor paper. I used the same watercolor pencils to color in the pinwheels, then I cut the pinwheels out and added them to my card.
Just a quick little card I created, because the idea popped into my head!
Thanks for stopping by!
Labels:
Faber Castell,
Hero Arts,
Lawn Fawn,
Spellbinders,
Stamp School
Wednesday, August 15, 2012
2 page Layouts
I've been making more 2 page layouts than normal lately. It seems I have a lot of photos from this summer, and getting them down to just a few doesn't seem to be working. I always feel like my 2 pagers aren't quite as fancy as my 1 page layouts. Anyone else ever feel like that? Today I thought I'd share 3 of the 2 pagers I've made recently.
Last month we got a dirt bike, mostly for my husband, but the kids like to go for (very slow) rides with him, and I'm learning how to ride it , too (and I haven't hurt myself...yet!). When I have a theme like dirt biking, I like to mix the more themed stickers and papers with "regular" patterned papers that go along with the color scheme.
For this layout, I used Moxxie Racing Burn Rubber paper to form the background base of the layout. Then, to keep it from being all dirt bike, I added pops of color with patterned paper from October Afternoon's 9 to 5 collection. Then, to bring the theme back around, I used some dirt bike and helmet stickers from EK Success.
Layout # 2 also mixes 2 collections:
We picked up a couple of build your own rockets to make and launch with the kids this summer. They're a lot of fun and go really, really high. This layout commemorates the inaugural launch. I used paper from Pink Paislee's Declaration collection. While it's more of a 4th of July collection, I felt the red, white, and blue theme went quite well with a rocket launch. To make the layout feel more rocket-y (it's totally a word) and less 4th of July-ish, I added stickers and journaling tags from October Afternoon's Rocket Age collection.
My final layout is just a bit of silliness.
My parents picked this up for my kids, and it's a lot of fun... so much fun that, if you look at the very far right picture, you'll see that I just had to get in on the fun too.
The paper is from a gorgeous collection by My Mind's Eye called On the Bright Side. It's fun and funky and really easy to create with.
So that's my tour of 2-page layouts for today. Thanks for stopping by!
Labels:
Moxxie,
My Mind's Eye,
October Afternoon,
pink paislee
Sunday, August 12, 2012
Glue Dots DT Call and a Fiskars' Fuse Project
Just a quick announcement and then on to my mini album. Many of you know that I am a Glue Dots® Dottess (this is what they call their design team members). I have been a Dottess for 2 years now and thoroughly enjoy it. It's time again for a new design team. You can find all of the call details here on the Glue Dots® blog. If you love using Glue Dots® and like being the first to play with new products (the Dottesses got to play with the Micro, XL, and XXL Dots before they were released!) I encourage you to try out. It's a great group of people to work with.
Okay, on to my mini album. Have you heard all the talk about Fiskar's new Fuse system? Fiskars is holding a contest where you can actually win a Fuse (and who wouldn't want to win a Fuse, right?). You can check out all the details of the contest here, there's still a lot of time to enter. I created this circle mini album using the circle Fuse pieces from the contest.
This mini album tells the story of the Baptism gown that my aunt (my sister's Godmother) sewed for her Baptism. I then also wore the gown, and just a few months ago, my aunt's first granddaughter wore it at her Baptism. I sandwiched chipboard between all of the patterned paper to make the album nice and durable.
Here's what the front side looks like:
And how about some close ups since that picture is teeny tiny:
Here's the back side:
and some close ups of the back side:
The patterned paper I used was from Lily Bee's Victoria Park Collection. The felt is from Stamp School, and the Baptism themed stickers are from Reminisce.
Thanks for stopping by!
Labels:
Fiskars,
Glue Dots,
Lily Bee,
Stamp School
Saturday, August 4, 2012
Lake Fun
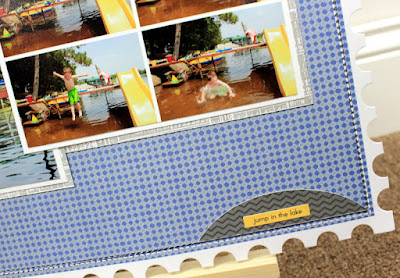
I took LOTS of photos on vacation this summer, so I've slowly been working my way through scrapping them. For these photos I used The Escape from Little Yellow Bicycle
The Escape is more of a travel/vacation themed line than a summer/water/swimming line, but as you can see it works just as well as Splash does for water fun. And really, how could you pass up that awesome camera paper?
I loved the die cut from The Escape. The faux stitching around the edge is actually embossed into the paper to give it a really cool texture.
Thanks for stopping by!
Labels:
Little Yellow Bicycle
Sunday, July 29, 2012
August Release
It's time for Stamp School's August Release.
Here's a card I made with the new sets. Can you guess what this month's theme is?
As you well know, I'm a big fan of using kraft as a neutral color. I stamped this fun present multiple times and colored the presents in with Copic markers (If you haven't tried using your Copic markers on kraft, you should really give it a go. You'll love the results!).
So if you haven't guessed this month's release is all about birthdays.
Here are the 2 new stamps sets:
| Birthday Icons |
Labels:
copic,
Stamp School
Thursday, July 19, 2012
Summer Fun
I thought I'd pop in with a couple of layouts of some of the fun we've been having this summer. I chose these 2 today because they both use October Afternoon paper. This first one uses Boarding Pass.
So, I'm not really big on posting a pic of myself in my swimming suit, but...I love this photo. It's not too often that I'm in a photo with my husband AND both kids. On top of that, we're all smiling and having a good time. I couldn't resist printing this one out in a 5 x 7 and scrapping it.
At first glance this layout appears really simple, but I some fun adding detail with some hand stitching that I really thing adds a lot to the layout.
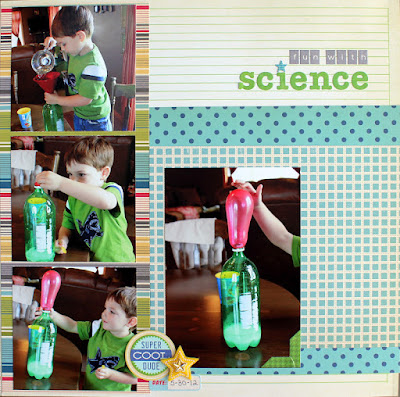
My second layout uses a little bit of this and a little bit of that, but the majority of the paper comes from October Afternoon's 9 to 5 line:
Even though school's out, I try to keep my little guys' brains engaged during the summer. They really enjoy doing interactive science experiments, and this is one they especially loved.
Here I combined a leftover bottle sticker with a birthday balloon puffy sticker to create a custom embellishment that looked like our experiment.
Thanks for stopping by!
Labels:
October Afternoon
Saturday, July 14, 2012
Gator Fun
I really love the bright photos I get in the summer. It seems the sun
is always shining, and everything is a vibrant color. I’ve been trying
to keep up with my summer scrapping this year, and recently finished
this layout using Little Yellow Bicycle’s Splash:
One of my favorite products from Little Yellow Bicycle are the pockets. I used the pocket from the Splash collection, but they make them for so many themes: baby, birthday, school, weddings, family, sports… well you get the idea. The best thing about these pockets is how customizable they are. They also make journaling really fun and easy. Even my husband couldn’t wait to pull the tabs out of the pocket to see journaling!
Here’s a close up of the left hand side of the layout:
and one of the right:
Thanks for stopping by!
Labels:
Little Yellow Bicycle
Subscribe to:
Posts (Atom)


