I picked up a frame a while back that I decided to fill with a
Fall Printable. When Christmas rolled around, I decided to create a
Christmas printable to put in the frame instead. Now that winter is here in full force and my Christmas decorations are properly tucked away, the frame needed some winter subway art.
I wanted something quick, so instead of creating my own printable
this time, I decided to look for something in the Silhouette store. I
found what I wanted, but it was a cut file that I needed to fill with color and turn into a printable instead. It's an easy thing to do and opens up a whole new world of possibilities for your
Silhouette. In case you have the desire to try this yourself, I have a little step by step tutorial today (if the photos are too small, just click on them and they'll pop up to full size photos).
Start by opening up your file and sizing it to the size you want it to be (I sized my page to 8 1/2" x 11", because that is the size of the paper I will be running through my printer. Then I sized my image to 7 1/2" 9 1/2", because that is the size of the opening in the frame I'm using).
Next, click on the tab in the upper right hand corner that takes you to line colors (it's the one with a bunch of colored lines on it). Click on your entire image, then click on the color you want the outline of your image (in my case all of the words) to be. I used a medium grey. If you don't want any outline showing, choose white.
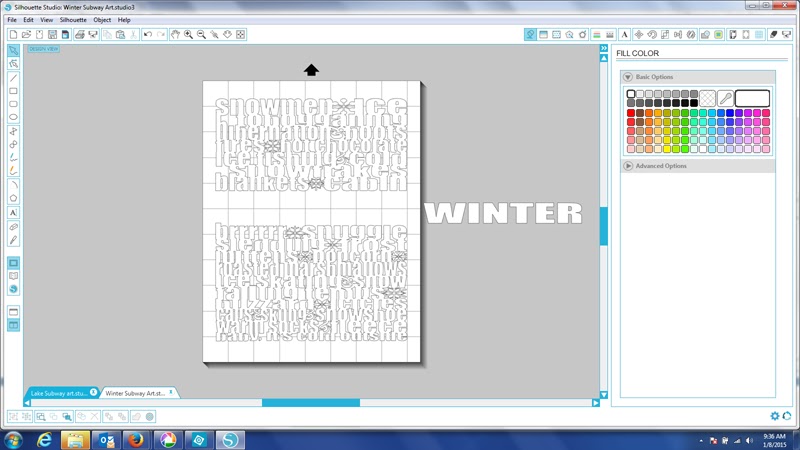
I wanted "WINTER" to be a different color than the rest of the words, so I ungrouped the image by right clicking on it and selecting ungroup from the pop up menu.
Then I slid "WINTER" off to the side out of my working area.
To color the inside of your words, click on the "Fill Color Tab" (which looks like a bucket dumping out paint). For a solid color, chose a preset color button. If you don't like any of the basic color options, click on advanced options and chose any color under the sun.
Instead of having a solid colored image, I wanted to a a fade to it. In order to do this, you need to click on the fill gradient tab (it's a square that is one color on top and a different one on the bottom). Click on the type of fade and color you'd like. If you want to change how many different times the image changes color, or where it changes color, open the advanced options area. Under the advanced options, you can add and/or move the color slider around to change the fade. This is a little tough to describe. The best thing to do is play around with it, so you can get the feel of it for yourself.
If you want to change the direction of the fade, there's also a way to do that. See the square with the red line in it? You can move that line around to control the direction of the fade. It can go vertical, horizontal, and even different degrees of diagonal. This is another great one to just play around with to see what happens.
When I had all of that set, I moved the "WINTER" back in place and repeated the process with grey tinting.
Before you can print, you have one last step. Click on the "line style" tab (the one with different continuous and dashed lines on it). Select your entire image, and make sure the "print lines of selected shapes" button is checked.
When you've done all that, all you need to do is click on the file button and click print. I chose to print this image out on a pale blue textured paper.
Now you're all set to frame your printable and enjoy it!
Thanks for stopping by!


1 comment:
Love this tutorial! Great job! Sharing on my FB page.
Post a Comment