Showing posts with label copic. Show all posts

Friday, September 15, 2017

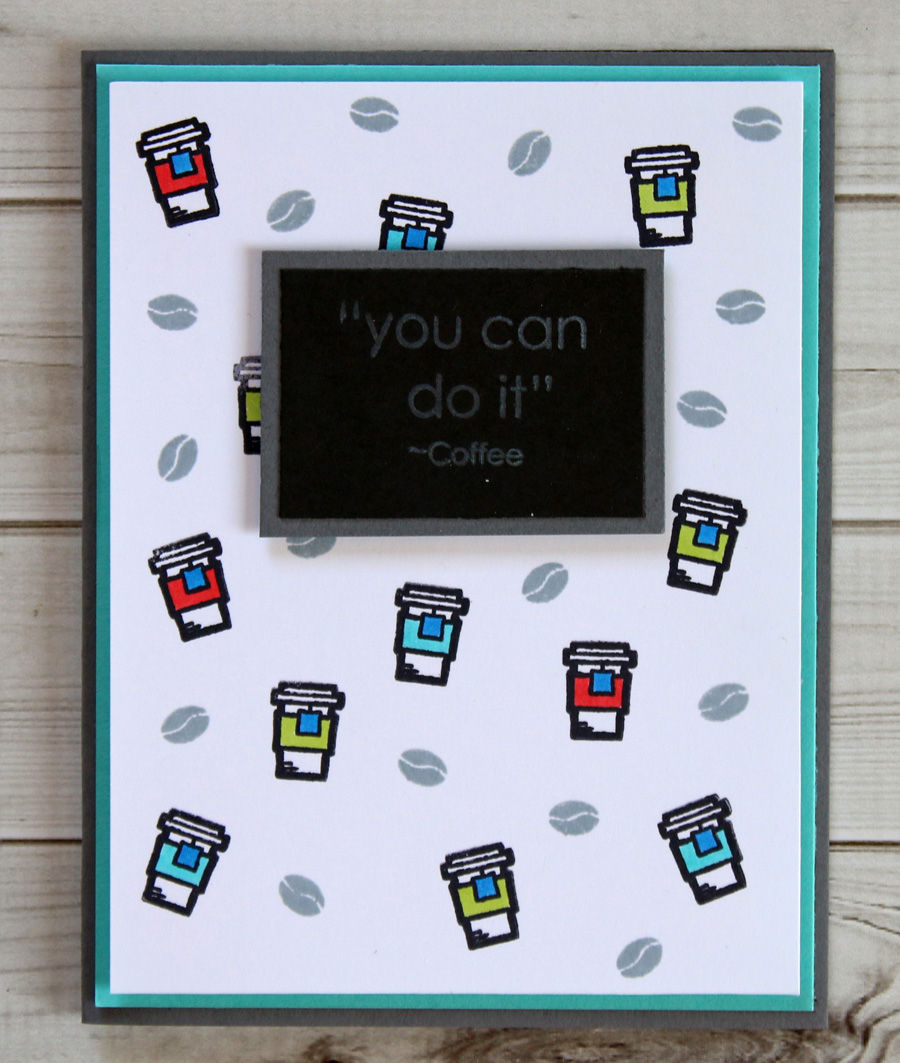
You Can Do It Coffee Card

The Coffee Lovers Blog Hop is going on through next week, and I thought it would be lots of fun to play along. Here's my You Can Do It coffee card.


I started with SRM's Coffee Plans stamp set. I haven't used my Copic Markers in a while, so I decided to uses those to create a fun background with the tall coffee cup that's part of the set.


I decided to play around with the color combo a bit. Instead of traditional fall colors, I drew inspiration from the beautiful reds and greens in my apple trees right now and how pretty they are against the bright blue fall sky. A little different that normal, but I like how it turned out.


I thought the "you can do it" sentiment would make for a fun card the next time I needed an encouragement card for a coffee loving friend.
Don't forget to check out the rest of the amazing cards for a bit of caffeinated inspiration.


I wrote this post while participating on the SRM design team.

Friday, May 19, 2017

Striped Birthday Card

Today I have a striped birthday card to share. It's a great way to use up your scraps, too!


This card went to one of my nephews. I always find it a bit tough to make cards for tween/teenage boys. I played around with a few color combos before I came up with this one. 


While I'm using this card for a birthday, I think it would make a neat graduation or congratulations card, too. I chose the "hooray!" stamp from SRM's Birthday Plans Stamp Set. I used a oval from My Favorite Things Dienamics Wonky Oval dies to create the base for the "hooray!" I decided it needed a bit more color, so I stamped a few stars (also from Birthday Plans) and colored them in.


This striped birthday card is a fun way to wish someone a very happy birthday!

I wrote this post while participating on the SRM design team.

Tuesday, May 2, 2017

Clean and Simple Birthday Card

There just happen to be a lot of birthdays in May in my husband's family. Add to that Mother's Day and graduations, and May is a big month for card making for me. Today I wanted to share a clean and simple birthday card I created for one of my nephews.


I've seen a simple plaid created with card stock many times, but never tried it. I love the clean look of it, and it really is such a simple technique. I love shades of blue, so I used 2 complimentary shades of blue and a pop of orange to add some contrast.


I used SRM's Birthday Plans stamp set for my greeting and candle. I used Copic markers to add a bit more color to the greeting. I used some Pop Up Glue Dots® to add my card front to my card base. I love the clean look of white on white, and the Pop Up Glue Dots® help give a tone on tone layer look with a little extra dimension.


This clean and simple birthday card is just one of 3 I'll be making this month. Do you find that you have a month where you tend to make a lot more cards?

I wrote this post while participating on both the Glue Dots® and SRM design teams.

Friday, June 24, 2016

Marbled Die Cut

Last week I shared a tutorial on how to make a marbled background with Yupo paper and Copic markers. Today I wanted to show that you can also die cut the marbled paper and make pretty marbled die cuts from Yupo paper as well.

 
I created the simple marbling with 3 Copic Markers on Yupo paper. Then I ran it through my Evolution Advanced Diecut machine. I find it's best to use a metal shim plate with the Yupo paper. Since it's a plastic paper you get a cleaner cut if you use a metal shim to cut against.


I used my die cut as the centerpiece for my card, since the marbling is just so pretty. I added a stamped sentiment from Altenew's Halftone Happy set. I added a little extra interest by scoring a frame around the die cut and layering it up on a pop of colored card stock. Since Yupo is a slick paper, I used some Micro Glue Dots® to attach my diecut to the card. Some Pop Up Glue Dots® between paper layers help add some dimension to the card.

Have you tried out this technique yet? I'd love to hear how you used you Copics with Yupo Paper.


This is a personal blog. All editorial content and projects are intellectual property of Taylor Stamped. I do receive financial compensation and material product from  Glue Dots® to develop my craft posts, but all ideas and opinions are my own.

Friday, June 17, 2016

Yupo Marbled Background

I was playing around with my Yupo paper the other day and found a cool way to combine it with Copic markers to create a Yupo Marbled Background.


As you can see, the effect is quite a bit different than what you get by just dripping alcohol ink onto Yupo paper.


Creating the marbled background on Yupo paper is really simple. Here's my supply list for the project:
  • Yupo paper (I'm using the white paper here, but the translucent Yupo would work, too)
  • Copic Markers (or any other alcohol based marker)
  • Alcohol Blending Solution
  • A Splat Mat (Not necessary, but this gets a little messy. I'm using the white Sticky Thumb Splat Mat)


Start by coloring your entire piece of Yupo paper with your Copic Markers. Here's where you can really get creative. Play around with all kinds of color combos. I chose 3 different colors, but 2-5 different colors will work. When we add the alcohol blending solution later, the colors will lighten up, so don't be afraid to chose darker colors for this technique.

I started with my blue color, added spots of green, and then filled in all of the remaining white space with the aqua marker. Try to leave little to no white space showing.


Now for the fun part: Take your alcohol blending solution and gently squeeze drops of it (directly from the bottle) onto your paper. In the photo above, you can see that I've started to drop the alcohol blending solution onto the left side of the Yupo paper, but not onto the right side yet.


Here's a close up of the blending solution in action. It will start to travel and push the colors around. The more blending solution you add, the more your ink will travel and mix. Play around with the amount you add to get the result that you like best. The hardest part comes when you're all done dripping on the alcohol blending solution: You have to wait for it to dry. There's no rushing this, just give it a bit of time so all of the blending solution can evaporate, leaving you a pretty Yupo marbled background.


When it's dry you can use it as a background on a card, or you can die cut it and make it the focal point of project. Today I'm sharing how I used it as a background, but will share a die cut piece later next week.


I used Altenew's Halftone Happy stamp set and Stamp School's Men in My Life stamp set to turn this into a Father's Day card. I really love that this technique can be used for just about any kind of card for any occasion!


So what do you think of this technique? Have you tried Yupo paper yet? I think this Yupo marbled background may just be my new favorite way to use Yupo paper!

Sunday, July 29, 2012

August Release

It's time for Stamp School's August Release.

 Here's a card I made with the new sets. Can you guess what this month's theme is?


 As you well know, I'm a big fan of using kraft as a neutral color. I stamped this fun present multiple times and colored the presents in with Copic markers (If you haven't tried using your Copic markers on kraft, you should really give it a go. You'll love the results!).

So if you haven't guessed this month's release is all about birthdays.

Here are the 2 new stamps sets:


Birthday Icons


Birthday Sentiments

These sets will be available Wednesday, August 1. 

You can check out some more amazing inspiration using these new sets on the other designers blogs:


Thanks for stopping by!


Tuesday, May 15, 2012

End of the School Year Gifts Part 2


As promised, I'm back today with one more end of the school year gift. These will be going to my son's teacher and teacher's aide.

You & Me

I always like to give a little gift with hand made touches. This year I picked up some insulated drink glasses that will be great for keeping summer drinks cool. Little Yellow Bicycle's Hello Spring was a perfect color match for the bright cups (I don't know why the cup is photographing red, but it's really a bright pink). I also created matching gift card holders from A Walk Down Memory Lane's on-line design team member Nicole's tutorial, that you can find by clicking here.


To create the cups you'll need some single serve drink mixes (I used Crystal Light lemonade).


You & Me
 

Tie about 5 individual packs together into a small bundle. Because I have a large cup, I will be putting 3 of these bundles into a cup (for a total of 15 drink mix packs in a cup), but you can adjust based on the size of your cup. 


Cut 1 - 12" x 1" piece of patterned paper, and 1 - 12" x 1 1/2" piece of paper. Adhere the smaller piece of paper on top of the larger piece. Cut off 3 1/2" (now you will have 2 pieces, 1 that is 8 1/2" long and one that is 3 1/2" long). Set aside the 3 1/2" piece for later.


Wrap the 8 1/2" strip of paper tightly around your drink mixes, and secure the overlapping ends with a strong adhesive like Glue Dots® Lines. 


At this point you can use flowers, stamps, ribbon, lace, twine, chipboard shapes, or just about any other pretty thing to decorate your drink mix wrap. When you are finished decorating, place the drink mixes into the cup and place the lid on the cup.


To create the flags for the straws, grab the 3 1/2" piece of layered patterned paper that you cut earlier. Use a scissors to cut a banner edge to one side. Use a craft knife or circle punch to create 2 holes to thread the straw through on the opposite side of the banner edge.
 Use your printer (or if you have nice handwriting, you can just write it out) to print "For a de"light"ful teacher" and "For a de"light"ful aide" on colored paper. Trim out the words and adhere them to your banner. Underline the words with colored rhinestones. Place the banners on the straws and you're set to go.


I also think these would make great hostess gifts for summer parties! 

Thanks for stopping by!

Thursday, March 1, 2012

Stamp School March Release


Wow! I have never stepped away from my blog for so long. Life got busy, like life can get, and unfortunately I neglected things here. But have no fear, I'm back in full force! You'll be hearing from me at least a few times a week again. Today I have 2 cards I made with Stamp School's March release stamps.


For the card above, I used the little medallion stamp from The Graduates to create the background. The graduation cap is also from The Graduates, and the sentiment is from To The Future. I stamped in Stamp School's Hot Fudge and Sour Apple ink. I added blue rhinestones to the brown medallions to add a little extra pop of color.


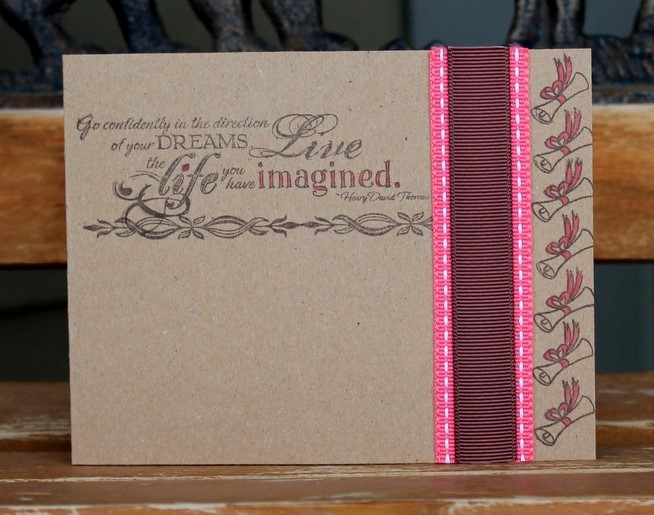
I wanted to keep this card clean and simple, so I stamped everything in Hot Fudge and added touches of pink with a Copic marker. The sentiment is from To The Future and the diploma and fancy stamp under the sentiment are from The Graduates. 

You can shop all of Stamp School's products and check out the new March releases (pictured below) by clicking on this link. Below are the brand new stamps and ink, felt, and card stock colors that were released today!

Stamp School The Graduates


Stamp School To The Future


Here are the new colors being released this month in: Paper, Ink, Felt!

Jelly Bean Green


Gumdrop Green


Limeade


Sour Apple


Thanks for stopping by!

Tuesday, January 31, 2012

Stamp School February Release Sneak

Stamp School's February sets and new ink, felt, and card stock colors are available tomorrow! Today, I thought I'd give you a sneak peak at one of the sets called Blessed Easter.


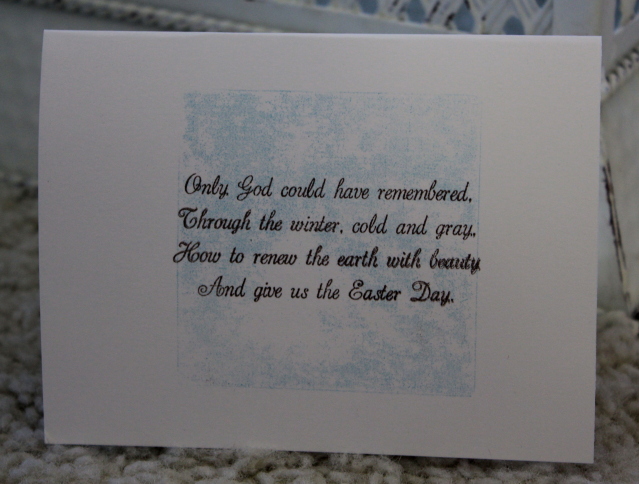
To mix things up a bit, I paired Blessed Easter with one of January's releases, Natural Landscape. I highlighted just a small portion on the tree to give the feeling of spring just beginning to bloom. I also used a stamp from Blessed Easter on the inside of the card.

Check out what the other Stamp School Faculty has created over at Stamp School's blog.

Supplies:
All supplies are from Stamp School except for the Copic Markers
Paper: Whip Cream, Cotton Candy, Berrylicious
Ink: Hot Fudge
Stamps: Blessed Easter, Natural Landscape

Thanks for stopping by today!

Saturday, November 19, 2011

Teal and Orange Party Decorations

 This month, Glue Dots® challenged its designers to create teal and orange party decorations. I happen to have Christmas on the brain, so mine are geared toward a teal and orange Christmas party. However I'll explain simple ways to change up the decorations to make them fit for other party situation, too. I have 2 ideas today. First up is a fun centerpiece:


I chose to make mine look like a Christmas ornament, but you could just as easily make yours look like a pumpkin, apple, or even switch out the shape for a star. My finished piece is just about 6" x 6". If you'd like to make one about the same size you'll need:
 
Ultra Thin or Craft Glue Dots®
A way to cut circles (or any other symmetrical shape). I used the Lifestyle Crafts nesting circle cutting dies.
3 - 12" x 12" pieces of paper (I used Authentique Gathering Grow and Together and Little Yellow Bicycle Hellow Fall Bundle-up Blue)
A scoring tool
A topper for your centerpiece (I used Fiskar's Scalloped Sentiments border punch to create an ornament topper).


Cut 12 circles and score them down the middle.


Attach the wrong sides of the circles together from the score line to the curved edge with Ultra Thin or Craft Glue Dots®. Repeat until you have a 12 adhered into a circle.

I cut the bottom of my circle off slightly to create a flat base instead of a rounded edge. Add your topper (ornament topper for an ornament, stem and leaves if you're making an apple or pumpkin).


For my second project I decided to make something that can be hung from a light or the ceiling. Make a dozen or so of these to really add ambiance to your party:


 For this project you'll need
Mini Glue Dots®
18" of orange ribbon per decoration
1 Teal pearl (If you don't have teal pearls, use a white one and color it teal with a Copic Marker)
Glitter paper (I used American Crafts Pow! Glitter Paper)
String to hang your piece from when you've finished.


 Cut your 18" ribbon into 3 - 6" pieces of ribbon. Form a loop with each piece. Adhere together using a Mini Glue Dot®

 Form each loop into an 8 shape by placing a Mini Glue Dot® in the center and pinching together.

 Layer all 3 loops on top of each other, adhering with mini glue dots.

Cut a shape from glitter paper for the center of your ornament. Depending on your theme, you can pick appropriate shapes: hearts for a wedding or baby shower, snowflake for a winter party, flowers for a spring party. Attach the glitter shape to the center of your ornament with a Mini Glue Dot®


 Add a teal pearl to the center of your glitter paper using a Mini Glue Dot. Add string and hang! My boys and I are going to add string and use a snowflake shape in the center and hand them out as Christmas ornaments to our family this year.

Happy party planning!

I wrote this post while participating on the Glue Dots® Design Team.