Showing posts with label We R Memory Keepers. Show all posts

Wednesday, July 22, 2020

Hello Travel Layout

I am finally on my last layout of pictures from Neuschwanstein Castle. It's such a gorgeous location that I took a ton of photos. It feels nice to be finishing up the section with this Hello Travel Layout.


I love getting to actually be in some of the photos we take when traveling. I especially love that we can take photos together without having to ask someone to take one for us. Such a change from when we started traveling together years and years ago!


This is another one of those layouts where I went back, back into my stash with We R Memory Keepers Wildflower collection mixed with other random embellishments from my stash.


Time to close this section of the Germany album and move on to the next!


Wednesday, July 15, 2020

Favorite Adventure Travel Layout

I'm continuing to work through some travel scrapbooking while also working through my stash. Today I have a Favorite Adventure Travel Layout to share.


I tend to have a lot of photos to scrap for travel layouts, so I do a lot of multi photo layouts. To make them fit on the layout and still have space for embellishments and journaling, I like to print my photos at 3 x 5 instead of the standard 4 x 6.


The paper on this layout is from an old We R Memory Keepers collection called Wildflower. I am trying so hard to get through my stash before buying anything new. I've purged a lot of papers, but still have a number of old collections stashed.


Old collections can get some new life when you add in embellishments from other collections. I've also found that I tend to put papers from a collection together in a different way when I put them away for a while.


Do you like to work through your stash, or would you prefer all new papers all the time?


Friday, May 11, 2018

Silhouette Birthday Cards

May is a busy month for cards for me. Between birthdays, Mother's Day, graduations, weddings, and end of the year teacher thank-yous, I feel like I'm constantly making cards. I tend to fall back on clean and simple designs. Today I have a couple of Silhouette birthday cards that use both the negative and positive cuts.


I used my Silhouette Cameo to cut "Happy Birthday" from a fun script style font.


I backed the negative cut with birthday paper from We R Memory Keepers Cakes and Candles collection.


Some Glue Dots® Pop-Up Dots help add some dimension to the card and helps make the greeting stand out more.


For my second birthday card I used the positive cut from my Silhouette. I used paper from WRMK Cakes and Candles again, but this time chose patterns that were a bit more colorful and busy.


These Silhouette birthday cards are a great what to send handmade greetings even when you are super busy!

I wrote this post while participating on the Glue Dots® design team.

Friday, October 27, 2017

Coffee Greeting Card

Hello! Today I have a bright coffee greeting card to share. I created it just for the fun of it, with no recipient or occasion in mind. It's not too often that I do that!


 I love the papers in Paper House's Color Washed Paper Pad, so I used that as my starting point. I grabbed a coffee cup clip from Paper House Coffee and Donuts Epoxy Clips. Not only does it make a cute embellishment, but it can double as a planner clip for the recipient of the card.


SRM has a cute coffee stamp set called Coffee Plans that I then used for my sentiment. It's all held together with Glue Dots® Tape (my new favorite tape runner) and some Pop Up Glue Dots® for dimension.


I felt like this card deserved a matching envelope, so I used the 1-2-3 Punch board from We R Memory Keepers to create a quick envelope with matching liner.

I wrote this post while participating on the Paper House Design Team.
I wrote this post while participating on the SRM Press Design Team. 
I wrote this post while participating on the Glue Dots® Design Team.

Friday, May 26, 2017

We Love You Mini Album

Hello! I'm excited to be bringing you my post for Paper House and Xyron's Family blog hop. Make sure to head on over to Paper House's blog, Facebook page to enter to win some great prizes from both manufacturers! My project is a We Love You mini album.


My sweet 2 year old niece lives far away from us, so I thought it would be fun to create a mini album full of pictures of our family with her (we just got back from visiting her), telling her the ways we love her.


I used a mix of Paper House One Big Happy Family and Hello Baby Girl to create the pages for my album.


I ran the photos and journaling tags through Xyron's 3" Sticker maker before adding them to my pages.


To keep this book kid friendly, I used only flat sticker embellishments from Paper House like the Embrace Today Labels, Family Planner Stickers, Beach Clear Stickers, Live Bold Planner Stickers, Bohemian Friends Clear Stickers, Embrace Today Planner Stickers, and Our Wedding Clear Stickers.


To make this a book my niece can actually flip through again and again without damage, I used Xyron's Creative Station to laminate the pages.


Finally, I spiral bound the whole thing with We R Memory Keepers Cinch.


I love that paper crafting projects can bring us closer together even though we may live far apart! This We Love You mini album is certainly one of those projects that can bridge the miles.


I wrote this post while working on the Paper House Design Team.
I received products from Xyron to create projects for this post.

Thursday, January 5, 2017

Love Layout

Today I'm scrapping a layout of my husband and me. I've had this photo printed out and sitting on the patterned paper I've wanted to use for about a year now. I finally stopped moving it around and decided to scrap this love layout!


Everything is from We R Memory Keepers Crush collection. The colors are rich but soft and there's a fantastic mix of colors and sketchy patterns in it. I really love Valentines themed collections that have pops of blue in them.


I also really love collections that have pops of metallics in them. This collection has lots of great pops of shiny gold throughout it.


A fun night out without the kids is always worth documenting. Even though this outing happened in November, it's perfect for scrapping with a bit of Valentine themed paper.


When's the last time you scrapped a picture of you and your love?

Monday, December 19, 2016

Gift Card Box

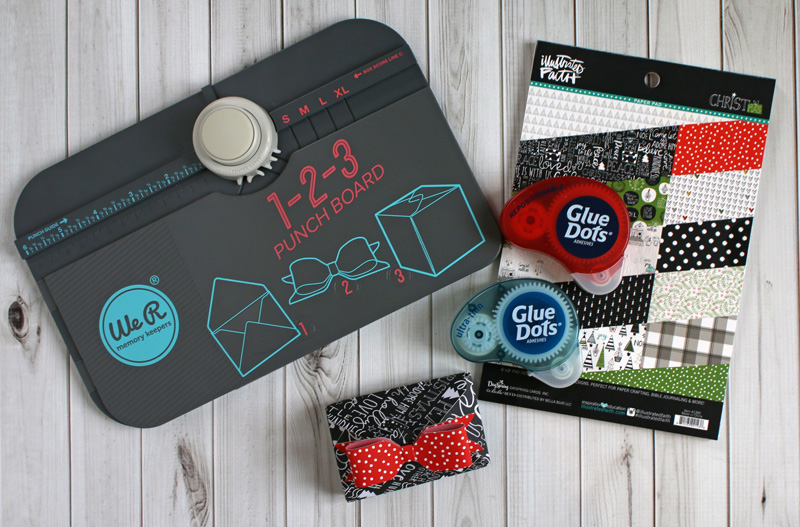
Today I wanted to share how I created a rectangle gift card box with my We R Memory Keepers 123 Punch Board. I created a Christmas gift card box, but this will work for any occasion, just switch out the paper. Do bear with me as there are a lot of photos in this post, but I promise, once you make one it's really easy.


For a 3 1/2" x 2 1/4" x 1/2" gift box all you'll need is the We R Memory Keepers 123 Punch Board, some adhesive (I love Glue Dots® Ultra Thin and Repositionable for this task), and a 5 5/8" x 5 5/8" piece of patterned paper (I used Bella Blvd Illustrated Faith Christmas).


The standard directions for making a box with the punch board will give you a square box, so to make a rectangle we need to change up the directions just a bit.


Step 1: Line up your paper to the 2" mark, punch, and score along Box Score Line A and Box Score line B.


Step 2: Without rotating your paper move it to the 2 3/4" mark, punch, and score along Box Score Line A and Box Score line B.


Step 3: Rotate your paper 90 degrees counterclockwise. Line your first score line up with the Box Score Line A line, punch, and score your paper along Box Score Line B.


Step 4: Without rotating your paper line up your second score line with the Box Score Line A line, punch, and score along Box Score Line B.

Now you're going to rotate your paper 90 degrees counterclockwise and repeat steps 1-4.


 When you've completed steps 1-4 twice, you'll be all set to assemble your box. Just follow the directions on the punch board for assembly.


I like to use a Repositionable Glue Dot® to hold my gift card snugly in the box.


You have 2 options for closing up the box. If you want it to lie flat, you'll have to skip the corner slitter punch, and your top will have a bit of an envelope look to it. Just use adhesive to hold it shut. 


I chose to use the corner slitter punch on my longer sides, and ended up with a gabled box top instead. 


To make the box a little more festive, I used the 123 Punch Board to create a bow (this is the XS bow size).


I give out a lot of gift cards, so I love having the option of making a quick gift card box now, too. If you're looking for a few more ideas for gift card giving, check out my festive Gift Card Envelopes or for a unique twist these Gift Card Coin Envelopes. If you have any questions about the creation of this gift card box, don't hesitate to leave me a comment or email me!

I wrote this post while participating on the Glue Dots® Design Team.

Friday, November 18, 2016

Halloween Mini Album

I know Halloween was last month, but I just finished up documenting our Halloween fun this year and I want to share my finished Halloween Mini Album.


I have photos of just a few of the pages from my mini album this year. I make one every year, because it's just so much fun. This year I used Doodlebug's Boos & Brews Collection. It's, of course, adorable and not too spooky.


I mixed and matched my pages in this album. I have horizontal pages that are 4" x 7" and vertical pages that are 5" x 6".


I used my We R Memory Keeper's Cinch to bind the album.  The binding runs the full length of the horizontal pages. The binding is centered on the vertical pages with about an inch of unbound edge above and below the binding.


If you do a lot of book, journal, or mini album binding, the Cinch is a must have tool. It's so easy to use!


I even threw in a little 4x5 page just for fun. I kind of like the "messy" look of this album with all of it's mismatched pages. 


Now that my Halloween mini album is done, I can move on to getting my December album prepared! What are you working on this week?

Monday, October 31, 2016

Haircut Layout

My 8 year old has been asking to color his hair green. He's a really good kid, and it so fits his personality, so we decided to let him. Truth be told, he loves it and so do I. Being a scrapbooker, I had to snap some photos of the process and make a haircut layout from them.


My kiddos have dark hair, so we had to go blond before he could go green. We had a good laugh about him looking like he should join a 90's boy band with the blond hair.


I recently added some Crate Paper Cool Kid to my stash. It was the perfect collection for my fun photos. The colors are rich but a bit muted, perfect for older boy layouts. There's some green in the papers, but not a lot. Just enough to coordinate with my photos while still keeping the focus on that bright pop of green hair.


I chose some denim alphabet stickers from We R Memory Keepers Denim Blues collection for the title. Since the alphabets are fabric, they can be a bit messy, but they have the righ tlook for this layout.


His hair will only be green for about 6 more weeks, but this fun haircut layout will help keep the memory forever. Some day he'll have the pictures to prove to his grandkids that he had green hare once! What's the craziest thing you've let one of your kids do?