I've been trying to work my way through my fairly big stash of paper, but recently I gave in a picked up a few new things from Jillibean Soup. Today I have a You Color My World Layout using some of those new papers.
I couldn't pass up Jillibean Soup's Shades of Color. I love the bright colors in this collection and the artsy feel of the patterns.
We don't get to go mini golfing too often, so when we had some extra family time when we were in Colorado last summer, we decided to take the kids to a place my husband and I had golfed a few times back when we were dating (many, many, many years ago).
Are you good at using your stash, or do you like to splurge occasionally like I did with this You Color My World Layout?
Thursday, March 29, 2018
Wednesday, March 28, 2018
Personalized Bible Cover
You can find me over on the SRM Blog today with a Bible cover I personalized using vinyl.
Head on over to the SRM blog to find out all the details.
Labels:
Bible Journaling,
silhouette,
SRM
Wednesday, March 21, 2018
Adventure Awaits World Sign
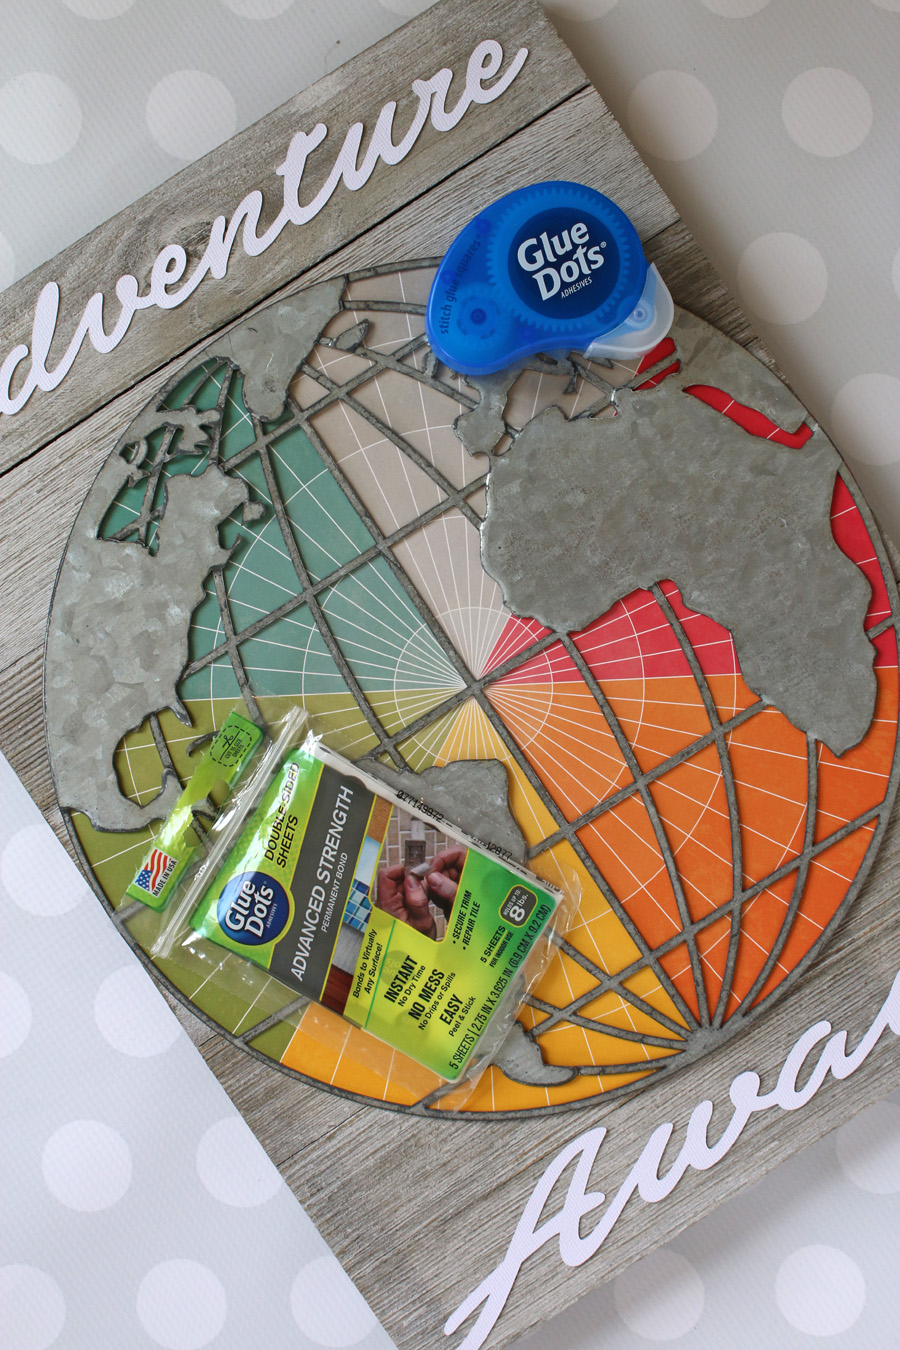
I really love creating customized decor for my home. today I have an Adventure Awaits world sign that I created to share with you.
This was a super fun project to put together. I ordered the galvanized world globe and 12x16 white wood panel from Jillibean Soup.
The galvanized world is a 12" circle, so all you need is a single sheet of 12 x 12 patterned paper to back it. I tried a few different options, but decided on piece called Flashy Tint from Jillibean Soup Shades of Color. I love the multiple colors and how the pattern seems to be made for a circle.
I cut "Adventure Awaits" from white card stock with my Silhouette Cameo.
I always feel like the hardest part of a project like this is figuring out what adhesive to use and how to put everything together. I ended up using Glue Dots® Advanced Strength sheets to attach the patterned paper to the galvanized world. Advanced Strength Glue Dots® are made especially for heavy duty projects with things like wood, metal, and glass. I used the sheets, so I could cut custom sized pieces for the back side of the world. The world has a small hanger built into the back of it, so I just used a nail to attach the world to the wood Panel. Finally, I used Glue Dots® Glue Squares to attach my "Adventure Awaits" words to the wood panel. Glue Squares® are also made for use with materials like wood, but are much smaller, so they were sized perfectly for my project.
This Adventure Awaits World Sign is already up and hanging on my wall. I love the bright pop of color it adds. What home decor project is on your to make list?
I wrote this post while participation on the Glue Dots® Design Team.
This was a super fun project to put together. I ordered the galvanized world globe and 12x16 white wood panel from Jillibean Soup.
The galvanized world is a 12" circle, so all you need is a single sheet of 12 x 12 patterned paper to back it. I tried a few different options, but decided on piece called Flashy Tint from Jillibean Soup Shades of Color. I love the multiple colors and how the pattern seems to be made for a circle.
I cut "Adventure Awaits" from white card stock with my Silhouette Cameo.
I always feel like the hardest part of a project like this is figuring out what adhesive to use and how to put everything together. I ended up using Glue Dots® Advanced Strength sheets to attach the patterned paper to the galvanized world. Advanced Strength Glue Dots® are made especially for heavy duty projects with things like wood, metal, and glass. I used the sheets, so I could cut custom sized pieces for the back side of the world. The world has a small hanger built into the back of it, so I just used a nail to attach the world to the wood Panel. Finally, I used Glue Dots® Glue Squares to attach my "Adventure Awaits" words to the wood panel. Glue Squares® are also made for use with materials like wood, but are much smaller, so they were sized perfectly for my project.
This Adventure Awaits World Sign is already up and hanging on my wall. I love the bright pop of color it adds. What home decor project is on your to make list?
I wrote this post while participation on the Glue Dots® Design Team.
Labels:
Glue Dots,
jillibean soup,
silhouette
Thursday, March 8, 2018
Baseball Foil Shirt
I'm over on the SRM blog today with a baseball foil shirt.
Head on over to the SRM blog to see all the details on how you can make your own custom foil shirt.
Labels:
silhouette,
SRM
Monday, February 19, 2018
Bible Journaling Stamps on a Layout
Today I'm challenging myself to try something new and I'm using Bible Journaling Stamps on a layout.
You can find all the details on this layout on the SRM Blog.
Labels:
Bible Journaling,
SRM
Friday, February 16, 2018
11 Years Layout
My kiddos just keep getting older. I'm so thankful for this hobby every time I do a layout like this 11 years layout. It helps me freeze a little spot in time to remember who they are at right this exact moment in time.
I'm just about done using up my stash of American Crafts True Stories. There are a lot of great stickers and embellishments in this collection, so I had a lot to chose from for embellishments.
I love the little naked wood embellishments that are in a lot of American Crafts collections. You can paint, stain, or ink them as well, but I usually love the look of them just plain.
I love this snapshot of this kid! It's so him, right now at this moment.
I'm just about done using up my stash of American Crafts True Stories. There are a lot of great stickers and embellishments in this collection, so I had a lot to chose from for embellishments.
I love the little naked wood embellishments that are in a lot of American Crafts collections. You can paint, stain, or ink them as well, but I usually love the look of them just plain.
I love this snapshot of this kid! It's so him, right now at this moment.
Labels:
American Crafts
Thursday, February 1, 2018
Brothers Layout
I'm still working on getting through my paper stash. Today I'm stash busting with this Brothers Layout.
I've found that, when I'm using up my stash, I often don't have the alphabet stickers I need for creating titles (I always seem to be missing the vowels and the letters s and t). When that happens, I just pop open my computer and create a title with my Silhouette Cameo. From creation to cutting, it's often just as fast as trying to get individual alpha stickers placed in the right spot.
The paper from my stash that I'm busy using up is American Crafts True Stories. I grabbed some of the cork stickers for embellishments. With the wood background in the photo, I thought the natural look of the cork went well. I was even able to use one as part of the title.
More of the stash is used up, and I love seeing these two together on this Brothers Layout.
I've found that, when I'm using up my stash, I often don't have the alphabet stickers I need for creating titles (I always seem to be missing the vowels and the letters s and t). When that happens, I just pop open my computer and create a title with my Silhouette Cameo. From creation to cutting, it's often just as fast as trying to get individual alpha stickers placed in the right spot.
The paper from my stash that I'm busy using up is American Crafts True Stories. I grabbed some of the cork stickers for embellishments. With the wood background in the photo, I thought the natural look of the cork went well. I was even able to use one as part of the title.
More of the stash is used up, and I love seeing these two together on this Brothers Layout.
Labels:
American Crafts,
silhouette
Subscribe to:
Posts (Atom)