
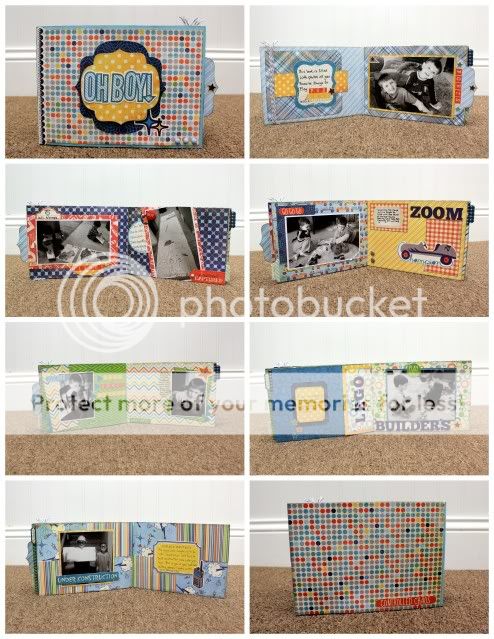
I've come a long way since that first mini album. Instead of buying albums to decorate, I now often make my own. I love being able to customize sizes and shapes. I joke around with my crafty friends that I can make a mini album out of anything: cardboard, paper, journaling tags, name badge holders, envelopes...well you get the picture. For today's album, I had the idea in my head that I wanted to make a mini album that had the look of a book edge. I played around with a few things and came up with this mini album:
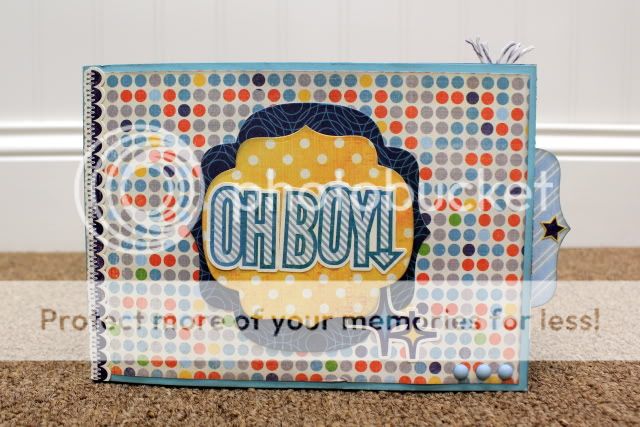
Here's a picture of the binding:

To create the cover for this book you'll need a nice strong card stock base. My finished book size is 5" x 7" so I'll be giving directions for that size book, but it's easy to adjust if you'd like a different size.
Take your card stock and cut 1 - 5" x 8 1/2" piece of card stock and 1 - 5" x 6 3/4" piece of card stock.

Score the 5" x 8 1/2" piece of card stock at 7" and 7 1/4" . This will leave you with a 5" x 7" section, a 5" x 1/4" section between score lines (this will be your spine), and a 5" x 1 1/4" section.
Use a strong adhesive like Scor-Tape to attach the 5" x 6 3/4" piece of card stock to the 1 1/4" section from the piece that you just scored. You'll want to attach the 5" x 6 3/4" piece of card stock 1/4" from the spine (1/4" + 6 3/4" = 7"). Not butting this piece directly up to the spine will make it easier for your book to open and close smoothly.
Now you have the cover of your book completely finished. To add pages to your book:

Then all you need to do is add photos, decorate, and enjoy!
Because my boys seem to change and grow right before my eyes, I made this album about the things that they like to do right now at this point in time. I've done a few mini albums with this theme over the years, and it's really fun to look back to see what's changed and what has stayed the same.
Supplies
Paper and Stickers: Echo Park A Boy's Life Collection Kit
Card Stock: Stamp School BerryliciousPaper and Stickers: Echo Park A Boy's Life Collection Kit
Accessories: Twine, Pebbles Ink Candy Dots, Craftworkcards Candi Dots,

1 comment:
Wow, Samantha! You really are very creative. I love your mini albums, they're fab! Kx
Post a Comment