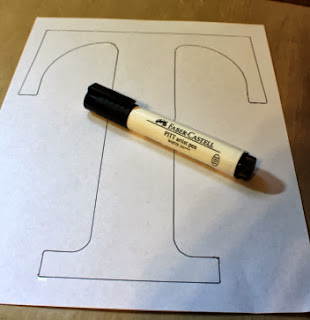
I have a Halloween door decoration over on the Pebbles Blog today, and I thought I'd give a detailed tutorial here about one part of that project. Today I'm going to show you how to turn scanned images into cut files for your Silhouette. Then, instead of hand cutting the patterned paper to lay over a wood letter (like the T in this project on the Pebbles Blog today) you can have your Silhouette cut it for you.
To start, you're going to need a clean, crisp image to scan into your computer. If you're scanning a stamp, all you need to do is stamp the image in black on white paper. If you have a wood letters (like the T above) or a chipboard album, you will need a black pen (I used a thick American Crafts Precision Pen) and a white piece of paper.
Once you've traced your image, it should look something like the picture below.
If you goof up and go outside the lines a bit when tracing, you can use a little white out or the Faber Castel PITT white pen to cover up your mistake.
Scan your image into your computer using whatever scanning software you're most comfortable with (I have a Lexmark scanner, so I used the basic software that came with it...no need to get fancy for this to work). Save your file as a standard image (usually .jpg). Close your scanning software and open your Silhouette software.
Open your scanned image in your Silhouette Studio program. It's important that you do not resize the image at any time during this process if you want you cut file to end up the same size as your original image.
Go into the Trace area of your Silhouette Studio (it's the button in the top right hand corner that is blue and yellow). Click on "Select Trace Area" (in the white toolbox on the right hand of the screen). Then use your mouse to draw a box around the entire image you want cut out. The lines on the image should turn yellow. The the yellow line isn't nice and solid, slowly increase the number in the box underneath "High Pass Filter" and the number in the box "Threshold". You can also check the box marked "Low Pass Filter". On the other hand, if your whole image is yellow, you will want to do the opposite and decrease the numbers in "High Pass Filter" and "Threshold".
When the area you want to cut is sufficiently highlighted in yellow click the button that says "Trace" (in the white toolbox on the right hand side of the screen). I now have 2 images in my open Silhouette document, the original scanned image that I imported (that I can now discard or move off the cutting area on my screen) and the actual cut file (shown in red).
*Note that you have a second option for tracing. There is a button just below "Trace" that says "Trace Outer Edge". This button is especially useful if you scan in a detailed stamped image, but you would only like to cut around the outer edge of the image, not all of the details as well.
From here, you can now use your scanned, cut-able file to cut the paper for your project (for my project I used it to cut the black paper for my T), and create offset images to cut for your project as well (I created an offset T and cut it in orange on my project).
Please feel free to ask any questions you have in the comments, and don't forget to check out details on how to make the Halloween Door Decoration shown here on the Pebbles Blog.


2 comments:
thank you, i needed this information smile
Thank you! I can't wait to try this!
Post a Comment