Wednesday, March 14, 2012

Papa's Work


Almost every time we go to visit my parents (who live about 7 hrs away), my boys  just have to visit their Grandpa at work. I have so many great photos of them in the bucket trucks and other equipment that's often housed at his work. Recently I've been working on a series of mini tag albums from each of their visits to give my dad as a Father's Day gift (I'll share those photos later). What I realized, is that I have all these great photos scrapped....and ready to give away. That's right, I hadn't scrapped a single one of them for my own album. Enter Simple Stories Awesome Collection. It's a great boy line, and you know I just can't resist a great boy line. I decided to do a quick 2 page layout of photos from by boys' most recent visit to Papa's work.


I know the 2-page layouts show up a bit small on my blog, but if you click on the photo, a much larger version will pop up. I really like this line (which means you'll be seeing a few more layouts from me using it in the near future). It's a bit grungy without feeling dark or dingy. It's also a boy line that doesn't feel so juvenile. While it works for little boys, it translates nicely into older kids as well. I picked up Awesome at A Walk Down Memory Lane. It doesn't appear to be in the on-line store yet, but it should be up any day, and you can pick it up now in the Brick & Mortar store.


Thanks for stopping by!

Saturday, March 10, 2012

How to Make a Chevron Pattern from Washi Tape

  Scrapbooking is like anything else, there are trends in products and styles. I really enjoy watching the current scrapbooking trends and finding ways to incorporate the ones I like into my style. Sometimes a trend feels "totally me", but other times I look at it and thing, hmmm....it could be me if I tweaked it.... That's what happened with me and the layout I'm showing today. I took 2 current trends: Chevrons (I love clean lines and lots of mixing of colors, so this trend is "totally me"), and washi tape (okay, this one can be me, but only when tweaked) and use them as a base. Which, resulted in a layout that is totally my style.


Both the Chevron border and the little flower in the corner are  made from washi tape. I'll give you the step-by-step on making the washi tape chevron border today, but the flower I'll have to save for another day.


I started with a 12" x 12" piece of card stock and 5 rolls of washi tape. The number of rolls that you use really doesn't matter, just choose some that you like. You will be completely covering the card stock, but washi tape can be a bit translucent, so remember that when you chose the color.  I chose one tape to start with and placed it diagonally from corner to corner.


Once I had the center strip placed, I continued to layer tape diagonally flush up against the previously laid strip. Work all the way from the center to the bottom corner, then work from the center to the top corner, alternating tapes as you go. Wrap the ends of your tape that hang off the paper around the back side of the card stock. 


Once you have finished, your paper should look like the paper in the photo below. Covering the entire piece of cardstock only took me about 5 minutes to do. Washi tape is really easy to work with. I cut 2 - 1 1/2" x 12" strips of paper (that I then cut into 1 1/2" x 6" strips of paper). Rotate what's left of your washi tape coverd paper 90 degrees, and cut 4 - 1 1/2" strips of paper. Cut these down so you have 4 - 1 1/2" x 6" strips of paper. 


You should now have 8 - 1 1/2" x 6" strips of paper. 4 will have the tape slanting from top left to bottom right, and 4 will have the tape slanting from bottom left to top right. Adhere the strips along the bottom of a 12" x 12" piece of card stock (I used Jillibean Soup Kraft card stock) alternating between the slanting down strips and the slanting up strips  to create the chevron pattern. Then all you have to do is decorate and add a photo or 2 to your layout.
 

Please feel free to post any questions you have in the comments and I'll be sure to answer them as best I can.

Thanks for stopping by!

Tuesday, March 6, 2012

Teal & Red Graduation Card


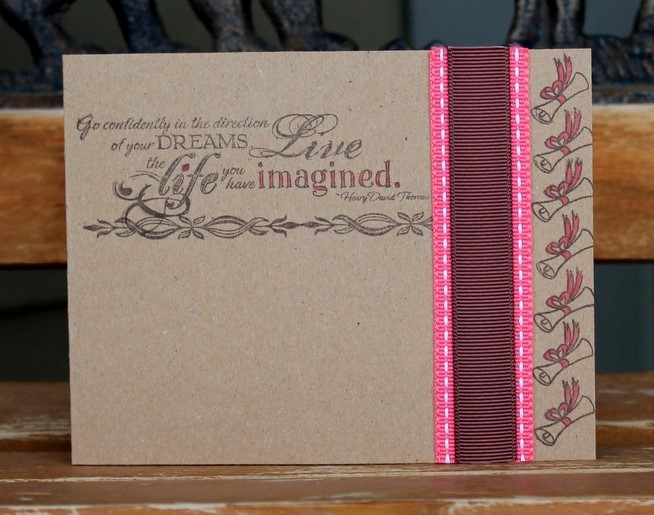
Hello! I'm posting over at Stamp School today. I thought I'd share a photo of the fun teal & red (or as we at Stamp School call them, Blue Raspberry and Wild Cherry) graduation card I made using this month's brand new Graduates stamp set.


If you want a full product list and step-by-step instructions, just head on over to Stamp School for all the information.

Thanks for stopping by!

Friday, March 2, 2012

Lots of Fun

So, I've never been to CHA, but I get the next best thing. Many of you know I do in store design work for my local scrap store, A Walk Down Memory Lane. When Lisa, the owner of AWDML, gets back from CHA she gets together with me and a few other ladies, and we divvy up the loot. We take it home and paper craft furiously for about 2 weeks at which time AWDML hosts a CHA open house where or projects are on display along with all the new lines, tools, embellishments, and other goodies that Lisa ordered for the store at CHA. Needless to say, this is one of my favorite times of the year. I love it just a little bit less than Christmas, and a little more than my birthday...seriously, it's just so much fun.

This year, I managed to make 14 layouts, 2 mini albums, a home decor piece, and a handful of cards. When asked what was my favorite, I didn't even have to think about it. This layout, hands down wins:


First of all, Saturdays by Little Yellow Bicycle is one of my favorite releases from CHA. There’s just something about the mix of denim blues, soft reds, off whites, and the caramely browns that made us fall in love! I think it also helps that this line is so versatile. It’s good for young and old, girls and boys. I also am just really happy with how all the layers came together to create an interesting, clean layout. You see the photos first and the papers and embellishments second. The only down side: there are so many more papers in this line that I want to use. I just couldn't fit them all on one page, so you'll be seeing more of Saturdays here on my blog soon.

Thanks for stopping by today!

Thursday, March 1, 2012

Stamp School March Release


Wow! I have never stepped away from my blog for so long. Life got busy, like life can get, and unfortunately I neglected things here. But have no fear, I'm back in full force! You'll be hearing from me at least a few times a week again. Today I have 2 cards I made with Stamp School's March release stamps.


For the card above, I used the little medallion stamp from The Graduates to create the background. The graduation cap is also from The Graduates, and the sentiment is from To The Future. I stamped in Stamp School's Hot Fudge and Sour Apple ink. I added blue rhinestones to the brown medallions to add a little extra pop of color.


I wanted to keep this card clean and simple, so I stamped everything in Hot Fudge and added touches of pink with a Copic marker. The sentiment is from To The Future and the diploma and fancy stamp under the sentiment are from The Graduates. 

You can shop all of Stamp School's products and check out the new March releases (pictured below) by clicking on this link. Below are the brand new stamps and ink, felt, and card stock colors that were released today!

Stamp School The Graduates


Stamp School To The Future


Here are the new colors being released this month in: Paper, Ink, Felt!

Jelly Bean Green


Gumdrop Green


Limeade


Sour Apple


Thanks for stopping by!

Friday, February 10, 2012

In my {felt} heart

Yesterday I blogged about this card over at Stamp School.


I am absolutely in love with the ease of cutting Stamp School Felt (colors here are Cotton Candy, Razzleberry, and Wild Cherry). It may be more expensive than acrylic blend felt, but once you go 100% wool felt, you'll never go back. I used the Sophia Heart die from Memory Box to cut this heart. I did use a metal shim to get the die's intricate patterns to cut crisply into the felt. I have a little step-by-step on stamping just part of the words from a larger word stamp (here I'm using Stamp School's Easter Blessings) without having to tape your stamp off over on my Stamp School blog post.  You can head on over there if you'd like to learn more about that.

Moxie Fab World also has a Die Cutting challenge going on until the 13th, so if you love die cutting felt like I do (or even just die cutting paper), head on over there for a fun challenge.

Thanks for stopping by!
Tuesday, February 7, 2012

You and Teddy


I have a table full of framed photos that my kids take annually right around their birthdays. There are always the most recent ones up, but I also keep up a number of my favorites as well. There's no rhyme or reason to the ones I keep up longer, just a few of my faves. Eventually, though, when old ones finally get switched out, they must get scrapped. This is one of those photos, taken when my now 5 yr old was 3.


My son used to take his stuffed bear, Teddy, everywhere and the photographer thought it would be fun to snap a few photos with the 2 of them together (he still sleeps with Teddy by the way). I'm not sure anything captures childhood quite like a kid and his favorite stuffed animal!


A few notes about the actual making of this layout. The papers and stickers are all left over from some calendar projects I made back in December. You can check them out here if you'd like to see them. All of the paper and the stickers are from Simple Stories' Year-O-Graphy collection. That heart is actually an intricate knot made from twine. I learned how to tie it from this video. It was really fun to do, and a different way to add some texture to the layout. The buttons are from Bo Bunny's Forever Fall and Snowfall lines.

Thanks for stopping by!