Tuesday, October 12, 2010

Proof That I Exist

Two weekends ago we went to the local pumpkin patch/corn maze/petting zoo. I, of course, took my camera along to capture all of the scrappable moments. I took lots of photos of my boys and my husband picking out pumpkins, pulling the wagon full of pumpkins, sitting with the pumpkins (etc., etc, etc.). When we were done we headed over to the corn maze. I started snapping photos again, and then it hit me, I needed proof that I was there too! I promptly handed my camera to my husband, grabbed my boys and captured the proof that I exist. It's hard to see, but I'm wearing a plum colored jacket. Since I rarely get to scrap in colors like pink and purple, I decided my plum jacket is as good as an excuse as any to scrap a layout in purple. This is one of my favorite "purple" lines, Peacock Lane by Bo Bunny. The little silver embellishments are I-rock gems. The twine is from The Twinery.
Just a reminder to make sure you end up in your family photos once in a while!

Monday, October 11, 2010

Pink and Orange Go Together

Two bits of info you need to know:
1. October is Breast Cancer Awareness Month.
2. I'm a proud Fiskateer.

Now let me put those 2 things together. A number of Fiskateers (23 to be exact) volunteered to take part in a challenge. After volunteering we were told that the challenge was to create a project using just 2 colors as our focus: Pink and Orange. The pink is in honor of Breast Cancer Awareness Month and the orange is because we are Fiskateers (you know Fiskars, those great orange handled scissors). This is how I'm celebrating the fact that pink and orange go together: As I said there are 23 projects that will be featured on the Fiskateer blog this week. Fiskalead Tami put together a really beautiful video giving a sneak peak of all 23 projects. You can see it by clicking here. These projects are amazing!
A few notes about the project:
First - If you love Fiskars and you're not already a Fiskateer head here to pick a Fiskalead to e-mail. Tell them that you love Fiskars and want to join the amazing Fiskateer community (and that Samantha T. #6363 sent you). They'll give you all the details and set you up with your very own Fiskateer number too! It's free, it's fun, and its full of Fiska-goodness.
Second - I lucked out to have the beautiful pink and orange paper that I used for my project just lying around in my stash at home. It's from 2 different My Mind's Eye collections; Ooh La La and Pretty Please.
Third - To make the cone you need 1/4 of a circle shape cut from patterned paper(a pie shaped wedge). Use a strong adhesive (I used Glue Dots® Continuous Line) along 1 edge and roll into a cone shape. The larger your 1/4 circle, the larger the cone will be. I embellished the top of the cone with strips of paper that had been punched with my Fiskars Upper Crest Punch and my Fiskars Apron Lace Punch. The pink metallic jewels on the cone were added with my I-rock.
Fourth - The flowers were cut with my Silhouette. I used my paper piercer to punch 2 holes through the center of the flowers. I ran thin copper wire up through the first hole in the flowers and then through a button. I looped the wire at the top and ran it back down through the second hole and twisted it off just underneath the flower. The copper wire makes it so the flowers can stand on their own (i.e. you could stand them up in a vase).
Fifth - I set 2 large eyelets along the top edge of the cone and looped ribbon through the cone. Now you can hang the cone over something (like a doorknob, chair, hook, etc.).

Thanks for stopping by!

Sunday, October 10, 2010

I Believe


I've been meaning to post this card for a while now. I made it all the way back in August for A Walk Down Memory Lane's CHA preview event. Now Moxie Fab World is having a Jolly Holiday Greetings contest, so I figured why not post it finally. The patterned paper, stamps, and ribbon are all from My Mind's Eye's really beautiful and fun new Christmas line called I Believe. That's it for me today, short and sweet!

Thursday, October 7, 2010

You and Me

My boys are pretty much always together. I often refer to them as Trouble 1 and Trouble 2 (Dr. Seuss fans out there catch the reference?). Some pictures just speak for themselves, and I think this is one of those photos. So today, the layout I give you simply says: You and Me. All of the paper is My Mind's Eye Alphabet Soup Boy. I've really fallen in love with the colors and patterns in this line. They're so perfect for scrapping boy pages. Believe it or not, I didn't think this was a line I needed until I saw it at A Walk Down Memory Lane. I can admit when I'm wrong...I love this line. Each of the squares on this layout are stitched with X stitches. I love the feel they give to the layout. They really make the individual squares of paper come together. The brackets behind the photo were cut with my Silhouette. The "you and me" sticker is from Cosmo Cricket. The off white button is from Jenni Bowlin, while the other buttons are from Bo Bunny.

Wednesday, October 6, 2010

4 Years

I think I've been feeling a bit sentimental lately. I can believe how quickly my kids are growing up, and I want to capture all of it. When it comes to journaling on layouts, I'm not the best. However, this recent sentimentality has led me to write quite a bit more on my layouts. Here's one I just finished about my oldest. I seriously can't believe he's 4 already!
For whatever reason, this layout went together really easily for me. I love mixing and matching patterned papers. The paper here is all from My Mind's Eye Alphabet Soup Boy except for the background "notebook" sheet of paper, which is Basic Grey.I used a mix of embellishments. The word stickers (smile, dimples, lovable) are Cosmo Cricket Tiny Type. The 4 yrs stickers are Bella Blvd One Fall Day. The tag that the 4 yrs is on is from Chatterbox. The blue circle is a washer that I covered in MME paper and stuck a MME Lush Brad through. That top left circle is a piece of cork. I, of course, couldn't call this layout complete with out a bit of hand stitching.Finally, those little pearls above the journaling are I-Rock pearls. If you don't have an I-Rock yet, all I have to say is, what are you waiting for? This is the coolest little tool! I've had mine for a week, and I already don't know what I did without it.
Thanks for stopping by!

Monday, October 4, 2010

Faux Flocked Brads

This month, the Glue Dots® Design Team Dottesses were given Sparkly Fluff to play around with from the generous people over at Our Craft Lounge. If you've never played Our Craft Lounge's Sparkly Fluff or their Craft Fluff, you're missing out, this stuff is fun, versatile and so easy to work with.
Today I'm going to share a super simple technique that pairs Glue Dots® with Sparkly Fluff to create a fun accent for a layout or card. For lack of a better name, I'm calling them Faux Flocked Brads.
What you'll need: Glue Dots® (I used Mini and Memory Book), and Sparkly Fluff or Craft Fluff (I used Brown Sugar Sparkly Fluff)
First you'll need to put your Glue Dots® where you want them on your layout, card, or project.
Second, cover the Glue Dots® with Sparkly Fluff. You will want to use a small bit of pressure to push the Sparkly Fluff onto the Glue Dots®. Shake off the excess Sparkly Fluff. You'll end up with something that looks like this:

I used a number of these faux flocked brads on this layout:I know I've mentioned before that you can find inspiration anywhere, and for this layout, I really did. I drew my inspiration from the Glue Dots catalog cover:


Supply List:
Papers: My Mind's Eye Alphabet Soup, Basic Grey Basics
Adhesives: Glue Dots® Mini, Memory Book, Dot 'n Go
Accessories: Imaginisce I-rocks Glam Rocks (pearl), My Craft Lounge Sparkly Fluff (Brown Sugar), Cosmo Cricket Tiny Type Alphas (red), Prima Flocked Alphas
Tools: Silhouette SD

I wrote this blog post while participating on the Glue Dots® design team.

Friday, October 1, 2010

Believe

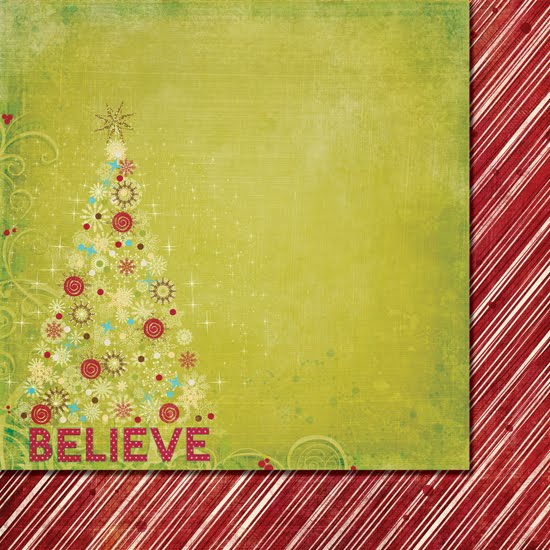
One of the best things about being on the in store design team at A Walk Down Memory Lane is that when Lisa (the owner) came back from CHA this summer, I got to play with a whole bunch of the goodies she brought back. When I saw this sheet of paper from Fancy Pants' Tradition: I just knew what I had to do with it. That tree was screaming to be cut out and adorned with jewels, pearls, Stickles, candy dots, and even drops of Diamond Glaze.
I actually built my layout around the tree, once I had it finished.This layout is makes me excited for Christmas already!

Supplies
Paper: Fancy Pants Tradition (Shimmer, Christmas Morning, Tradition Strips, Tradition Cards)
Accessories: Prima Flower Centers, Basic Grey Pearls, Kaisercraft Rhinestones (Red, Green, Blue), Stickles (Waterfall), Pebbles Candy Dots (Brown)
Tools: Bazzill in Stitch’z Template